Divider in SwiftUI
DevTechie Inc
DevTechie Inc

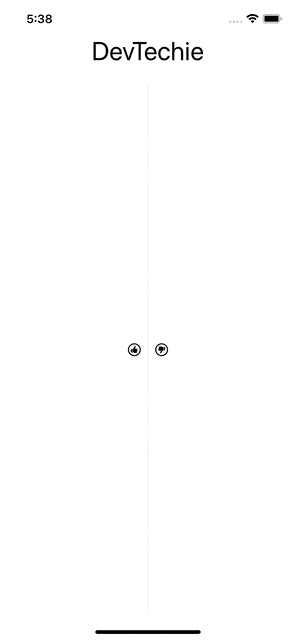
Divider is a visual element that is used to separate surrounding views by drawing a line either in horizontal or vertical direction. Divider is smart enough to draw a thin line horizontally or vertically by looking at the stack its being drawn on.
For example, if we add divider in an HStack, it will be a vertical line:
struct DevTechieDividerExample: View {
    var body: some View {
        VStack {
            Text("DevTechie")
                .font(.largeTitle)
            HStack {
                Image(systemName: "hand.thumbsup.circle")

                Divider()

                Image(systemName: "hand.thumbsdown.circle")
            }
        }
    }
}
Divider takes as much space as provided by the parent. We can control that by adding a frame modifier to divider.
Divider().frame(height: 20)

Let’s change HStack to VStack:
struct DevTechieDividerExample: View {
    var body: some View {
        VStack {
            Text("DevTechie")
                .font(.largeTitle)

            VStack {
                Image(systemName: "hand.thumbsup.circle")

                Divider()
                    .frame(height: 20)

                Image(systemName: "hand.thumbsdown.circle")
            }
        }
    }
}
Notice the space between Divider and Image views, that’s our frame modifier’s effect.
Change height to width and value to 100, this will shorten the Divider.
Divider().frame(width: 100)

If we want to change color of Divider then we will have to use overlay modifier as foregroundColor modifier doesn’t work on Divider view.
Divider()
.overlay(.orange)
.frame(width: 100)

Divider without without any stack is a horizontal line on screen:
struct DevTechieDividerExample: View {
    var body: some View {
        Divider()
    }
}
We can’t adjust thickness of Divider but we can use overlay modifier after setting the frame to achieve the effect.
Divider()
.frame(height: 5)
.overlay(Color.orange)

We can use background modifier with Divider as well and it gives Divider a cool effect in my opinion.
Divider()
.frame(height: 15)
.background(Color.orange)

With that we have reached the end of this article. Thank you once again for reading. Don’t forget to follow 😍. Also subscribe our newsletter at https://www.devtechie.com