How to resize Image in SwiftUI?
DevTechie Inc
Working with Image View in SwiftUI is very easy, but if we don’t add modifiers in the correct order, it can become challenging.
In this article, we will see various Image resizing practices.
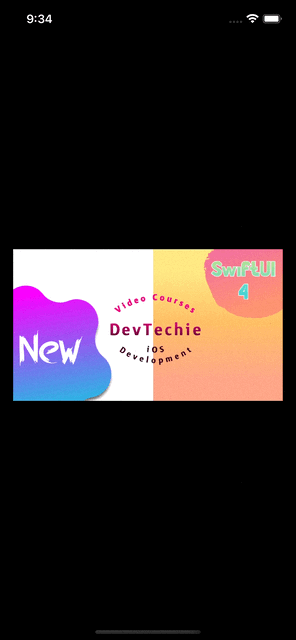
Let’s start with an example to play with. I have added image below in project assets folder.

Next create a view with Image View:
struct ImageResizeExample: View {
    var body: some View {
        Image("sample")
    }
}
Build and run.

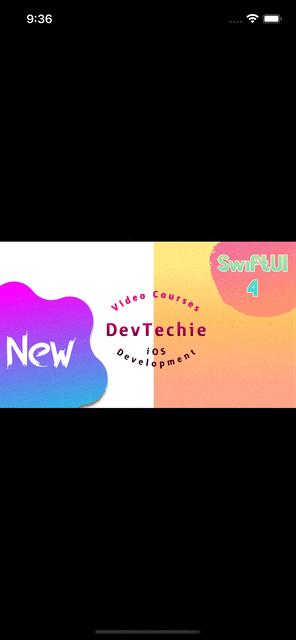
By default, SwiftUI’s Image view tries to take as much space as possible and displays the entire image. We can fix this by adding resizable modifier, which resizes the image to the screen size.
struct ImageResizeExample: View {
    var body: some View {
        Image("sample")
            .resizable()
    }
}
This will stretch our image to fill the entire screen:
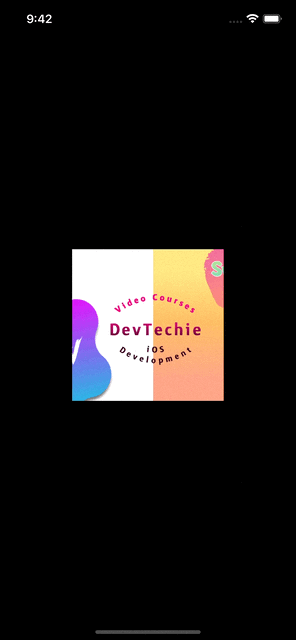
Next, we can ask image to scale to fit while maintaining the aspect ratio with the help of .scaledToFit() modifier.
struct ImageResizeExample: View {
    var body: some View {
        Image("sample")
            .resizable()
            .scaledToFit()
    }
}
We can set fixed width and height for the image while maintaining the aspect ratio as well.
struct ImageResizeExample: View {
    var body: some View {
        Image("sample")
            .resizable()
            .scaledToFit()
            .frame(width: 200)
    }
}
Setting fixed height:
struct ImageResizeExample: View {
    var body: some View {
        Image("sample")
            .resizable()
            .scaledToFit()
            .frame(height: 200)
    }
}
Instead of scaledToFit , we can also use aspectRatio modifier.
struct ImageResizeExample: View {
    var body: some View {
        Image("sample")
            .resizable()
            .aspectRatio(contentMode: .fit)
    }
}
We can also fill the image to available space by using scaledToFill modifier or aspectRatio with .fill as contentMode.
struct ImageResizeExample: View {
    var body: some View {
        Image("sample")
            .resizable()
            //.scaledToFill()
            .aspectRatio(contentMode: .fill)
    }
}
We can clip image using .clipped modifier:
struct ImageResizeExample: View {
    var body: some View {
        Image("sample")
            .resizable()
            //.scaledToFill()
            .aspectRatio(contentMode: .fill)
            .frame(width: 200, height: 200)
            .clipped()
    }
}
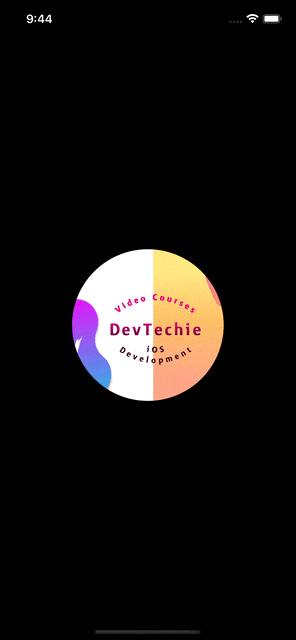
We can clip image to a shape with .clipShape modifier:
struct ImageResizeExample: View {
    var body: some View {
        Image("sample")
            .resizable()
            //.scaledToFill()
            .aspectRatio(contentMode: .fill)
            .frame(width: 200, height: 200)
            .clipShape(Circle())
    }
}
With that we have reached the end of this article. Thank you once again for reading. Don’t forget to follow 😍. Also subscribe our newsletter at https://www.devtechie.com