Offset Animation in SwiftUI
DevTechie Inc
SwiftUI views have many animatable properties. Today we will look at Offset.
We use offset(x:y:) to shift the displayed contents by a specified amount in the x and y params.
Note that while offset shifts the view, the original dimensions of the view aren’t changed by offsetting the contents.
Let’s take a look at an example of offset first:
struct OffsetAnimationExample: View {
var body: some View {
ZStack {
RoundedRectangle(cornerRadius: 20)
.fill(Color.orange)
Text("DevTechie")
.font(.largeTitle)
.foregroundColor(.white)
}
.frame(width: 200, height: 100)
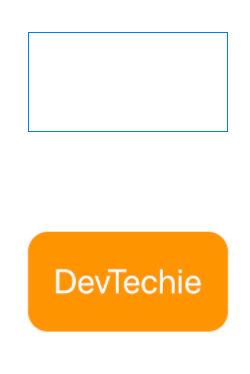
.offset(y: 200)
}
}Output below is captured from preview. Notice blue outline below 👇. This represents original dimensions of the view but orange box shows view after offset is being applied.
So now we understand offset a little better, let’s animate it. Animating offset is as easy as applying animation modifier to the view, as shown below:
struct OffsetAnimationExample: View {

    @State private var animate = false

    var body: some View {
        ZStack {
            RoundedRectangle(cornerRadius: 20)
                .fill(Color.orange)
            Text("DevTechie")
                .font(.largeTitle)
                .foregroundColor(.white)
        }
        .frame(width: 200, height: 100)
        .offset(y: animate ? 200 : 0)
        .animation(.spring(), value: animate)
        .onTapGesture {
            animate.toggle()
        }
    }
}
Animation modifier is one way, another way to animate is to wrap changing value inside withAnimation block, as shown below:
struct OffsetAnimationExample: View {

    @State private var animate = false

    var body: some View {
        ZStack {
            RoundedRectangle(cornerRadius: 20)
                .fill(Color.orange)
            Text("DevTechie")
                .font(.largeTitle)
                .foregroundColor(.white)
        }
        .frame(width: 200, height: 100)
        .offset(y: animate ? 200 : 0)
        .onTapGesture {
            withAnimation {
                animate.toggle()
            }
        }
    }
}
withAnimation block takes Animation as a parameter so we can customize animation curve as well. Let’s make our view a bit springggggy 😃
struct OffsetAnimationExample: View {

    @State private var animate = false

    var body: some View {
        ZStack {
            RoundedRectangle(cornerRadius: 20)
                .fill(Color.orange)
            Text("DevTechie")
                .font(.largeTitle)
                .foregroundColor(.white)
        }
        .frame(width: 200, height: 100)
        .offset(y: animate ? 200 : 0)
        .onTapGesture {
            withAnimation(Animation.spring(response: 0.2, dampingFraction: 0.4, blendDuration: 0.8).speed(0.3)) {
                animate.toggle()
            }
        }
    }
}
With that we have reached the end of this article. Thank you once again for reading. Subscribe to our weekly newsletter at https://www.devtechie.com