New in SwiftUI 3: Badges in SwiftUI 3 and iOS 15
DevTechie Inc
DevTechie Inc
SwiftUI 3 and release of iOS 15 added native support for badges. Badge play a significant role in my apps today. Before the release of SwiftUI 3, badge support would require custom implementation but with the introduction of .badgemodifier, adding badge is easier than ever.
Badges in iOS are displayed in list rows or tab bars. They are used to convey supplementary information about the view. Badge content is short, most of the times it’s a number or a single word.
Let’s look at .badge modifier with TabView
struct BadgeInTabExample: View {

    var body: some View {
        TabView {
            Color.orange.opacity(0.5)
                .edgesIgnoringSafeArea(.top)
                .tabItem {
                    Label("Explore", systemImage: "globe")
                }


            Color.blue.opacity(0.5)
                .edgesIgnoringSafeArea(.top)
                .tabItem {
                    Label("Search", systemImage: "magnifyingglass")
                }

            Color.pink.opacity(0.5)
                .edgesIgnoringSafeArea(.top)
                .tabItem {
                    Label("Trending", systemImage: "chart.line.uptrend.xyaxis")
                }

            Color.cyan.opacity(0.5)
                .edgesIgnoringSafeArea(.top)
                .tabItem {
                    Label("Trending", systemImage: "person")
                }

        }

    }
}
This will create simple tabView and four tabs with different colors.

Let’s add .badge modifier:
struct BadgeInTabExample: View {

    var body: some View {
        TabView {
            Color.orange.opacity(0.5)
                .edgesIgnoringSafeArea(.top)
                .tabItem {
                    Label("Explore", systemImage: "globe")
                }
                .badge("10")


            Color.blue.opacity(0.5)
                .edgesIgnoringSafeArea(.top)
                .tabItem {
                    Label("Search", systemImage: "magnifyingglass")
                }


            Color.pink.opacity(0.5)
                .edgesIgnoringSafeArea(.top)
                .tabItem {
                    Label("Trending", systemImage: "chart.line.uptrend.xyaxis")
                }
                .badge(5)

            Color.cyan.opacity(0.5)
                .edgesIgnoringSafeArea(.top)
                .tabItem {
                    Label("Trending", systemImage: "person")
                }
                .badge("1 update")

        }

    }
}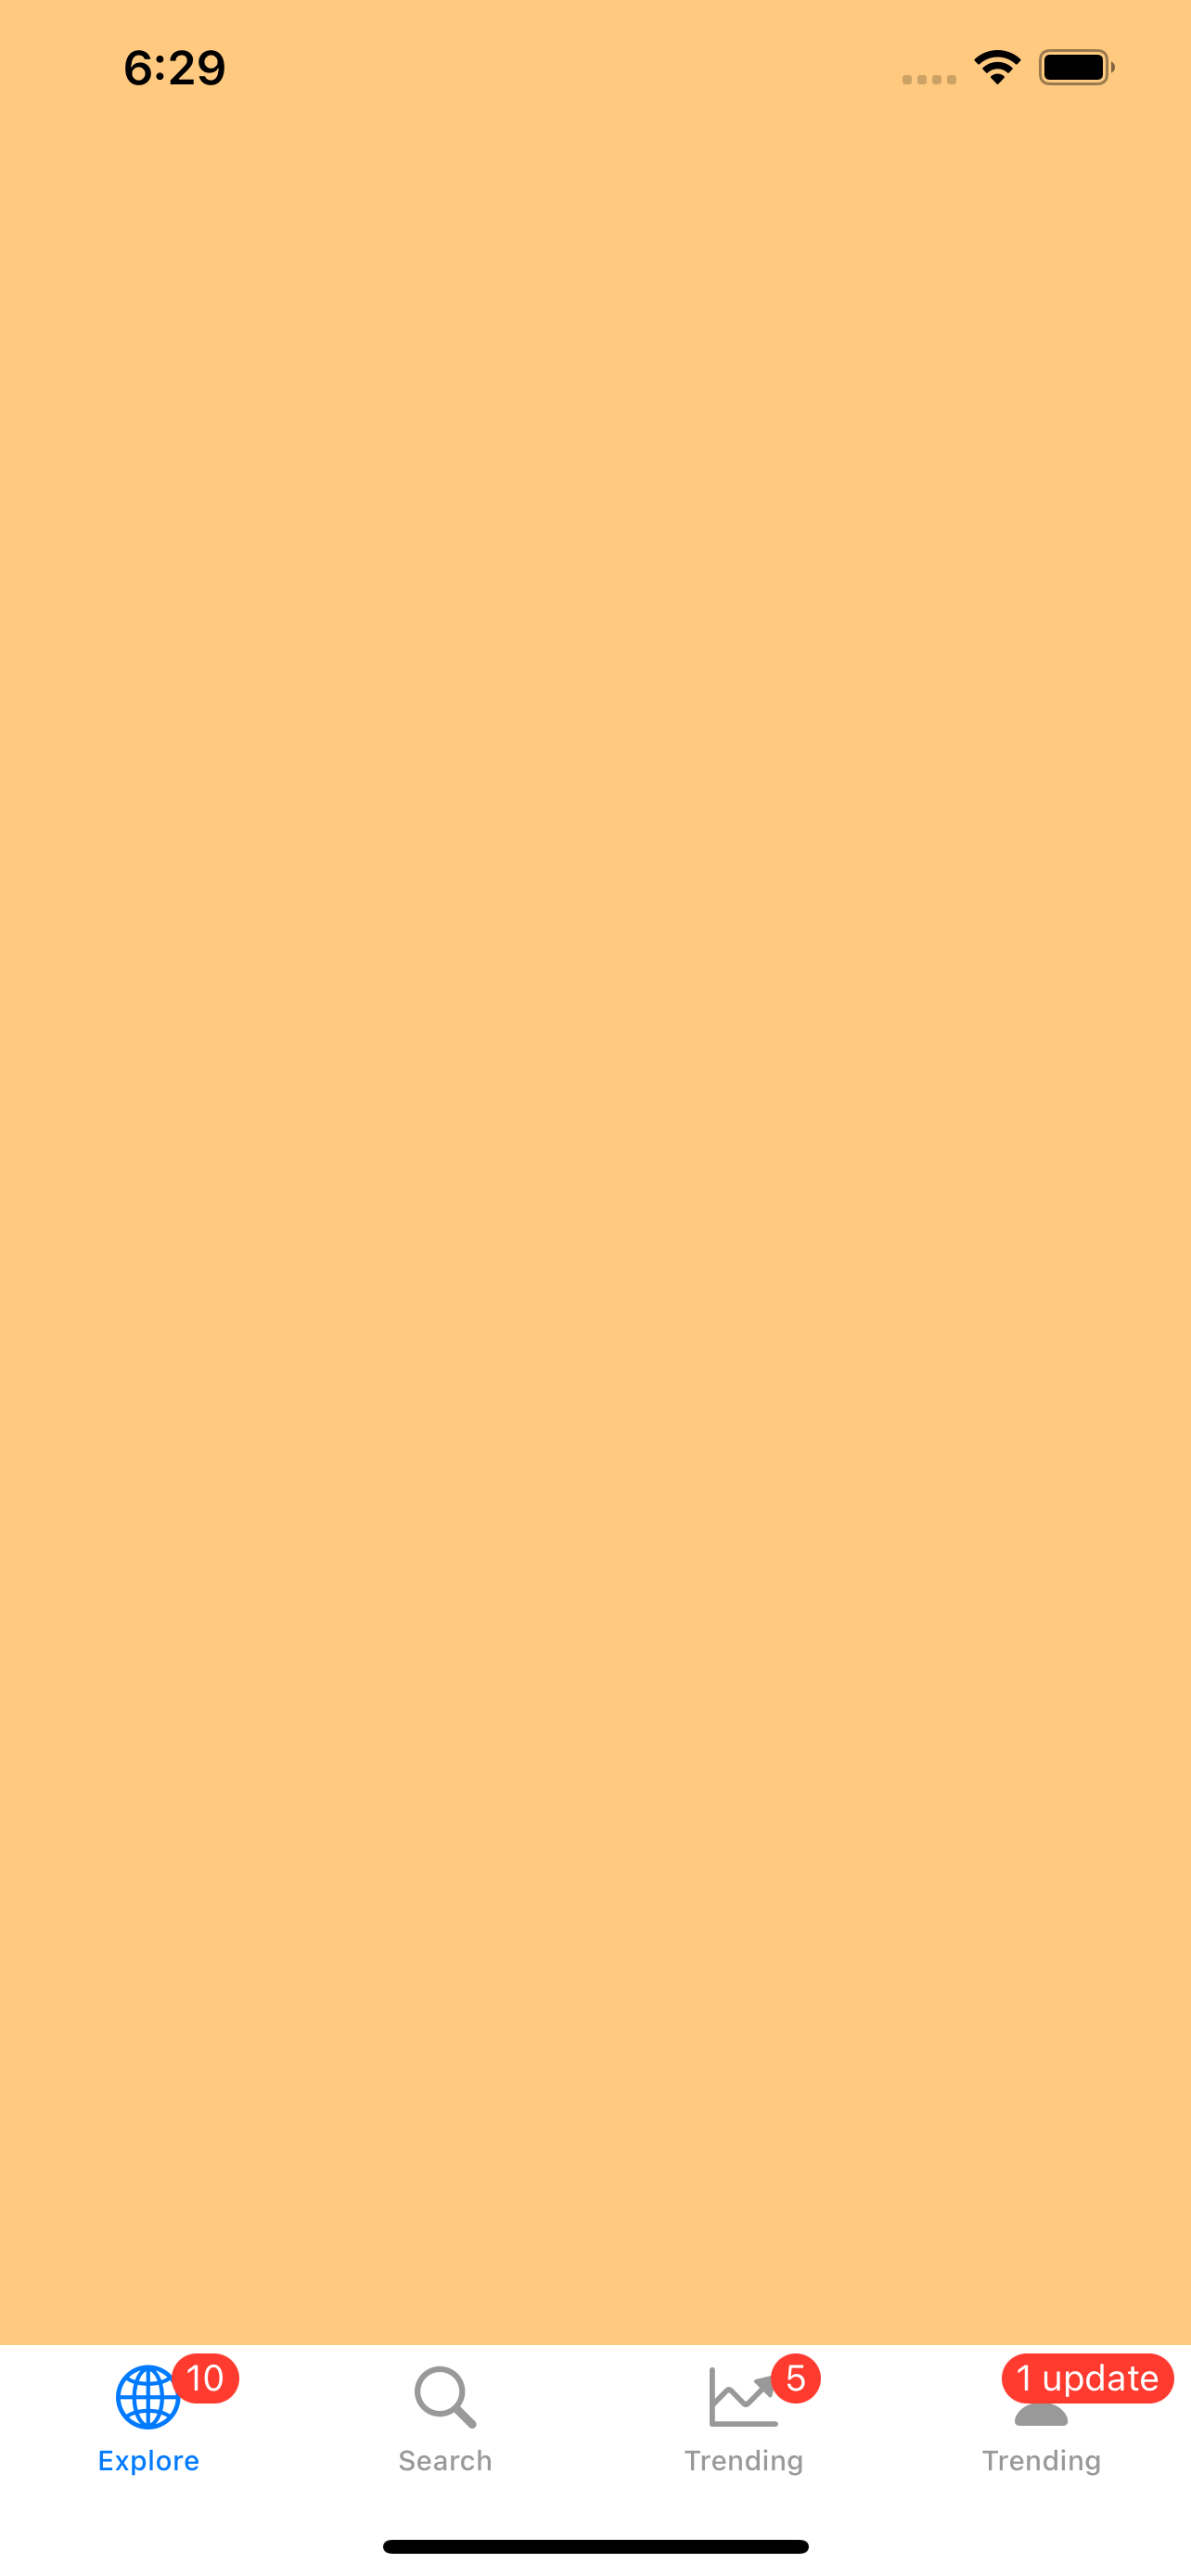
That’s all it takes to add a badge to tab. Like magic 🪄
Badges are used in List as well so let’s take a look at them in List setting.
We will use DevTechie courses app as an example so lets create model and sample data
struct DevTechieCourse: Identifiable {
    var id = UUID()
    var name: String
    var chapters: Int
}extension DevTechieCourse {
    static var sampleData: [DevTechieCourse] {
        [
            DevTechieCourse(name: "Machine Learning in iOS", chapters: 10),
            DevTechieCourse(name: "CollectionViews in iOS", chapters: 12),
            DevTechieCourse(name: "SwiftUI DeepDive", chapters: 14),
            DevTechieCourse(name: "Goals App in SwiftUI", chapters: 16),
            DevTechieCourse(name: "Firebase and SwiftUI", chapters: 8),
            DevTechieCourse(name: "Disney Plus Clone in SwiftUI", chapters: 15),
            DevTechieCourse(name: "Strava Clone in UIKit, iOS and Swift", chapters: 11),
            DevTechieCourse(name: "Data Structures and Algorithms in Swift", chapters: 21),
        ]
    }
}
And we will use this to create our list
struct BadgeInListExample: View {
    var sampleData = DevTechieCourse.sampleData

    var body: some View {
        NavigationView {
            List(sampleData) { course in
                Text(course.name)
                    .bold()
                    .font(.title2)
                    .padding(.vertical)

            }
            .navigationTitle("DevTechie Courses")
        }
    }
}
Course title is being displayed just fine but notice in the model we also have number of chapters for each course, let’s put them into badge.
struct BadgeInListExample: View {
    var sampleData = DevTechieCourse.sampleData

    var body: some View {
        NavigationView {
            List(sampleData) { course in
                Text(course.name)
                    .bold()
                    .font(.title2)
                    .padding(.vertical)
                    .badge(course.chapters)

            }
            .navigationTitle("DevTechie Courses")
        }
    }
}
Once again, adding single line of code gives us ability to show badge on List as well.
Badge function comes with three overloads:
func badge(Text?) -> some View
Generates a badge for the view from a text view.func badge(LocalizedStringKey?) -> some View
Generates a badge for the view from a localized string key.func badge(Int) -> some View
Generates a badge for the view from an integer value.
We have seen string and Int version so let’s look at Text overload. You can use Text view to display badge as well.
struct BadgeInListExample: View {
    var sampleData = DevTechieCourse.sampleData

    var body: some View {
        NavigationView {
            List(sampleData) { course in
                Text(course.name)
                    .bold()
                    .font(.title2)
                    .padding(.vertical)
                    .badge(Text("Chap: \(course.chapters)"))
            }
            .navigationTitle("DevTechie Courses")
        }
    }
}
We can use Image view inside Text view but for badge that will show a warning “Only unstyled text can be used with badge(_:)”
struct BadgeInListExample: View {
    var sampleData = DevTechieCourse.sampleData

    var body: some View {
        NavigationView {
            List(sampleData) { course in
                Text(course.name)
                    .bold()
                    .font(.title2)
                    .padding(.vertical)
                    .badge(Text("\(Image(systemName: "\(course.chapters).circle.fill"))"))
            }
            .navigationTitle("DevTechie Courses")
        }
    }
}
With that, we have reached the end of this article. Thank you once again for reading, if you liked it, don’t forget to subscribe our newsletter.