.clipped modifier can be used to clip image. This modifier is used to clip overflowing image content.
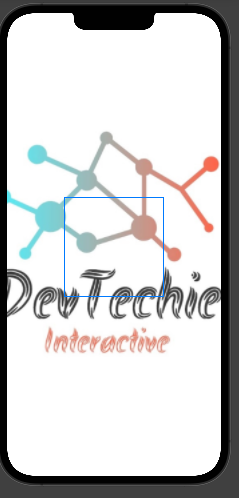
To understand this better, we will start with original image size:
struct ImageExample: View {
    var body: some View {
        Image("dt")
    }
}
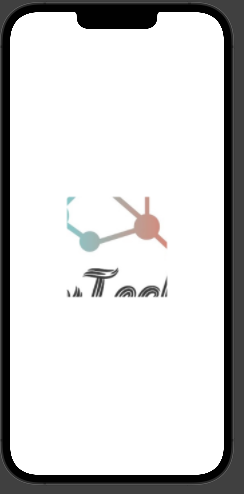
Next, we will apply 200x200 frame to the image view.
struct ImageExample: View {
    var body: some View {
        Image("dt")
            .frame(width: 200, height: 200)
    }
}
Notice blue rectangle in screenshot above 👆
This rectangle represents frame of our image view but since the image is larger than the size of original image(we are not applying resizable modifier here), image retains its content and is overflowing outside the frame of Image view.
Now we are ready to clip image to see the effect this modifier has on image content.
struct ImageExample: View {
    var body: some View {
        Image("dt")
            .frame(width: 200, height: 200)
            .clipped()
    }
}
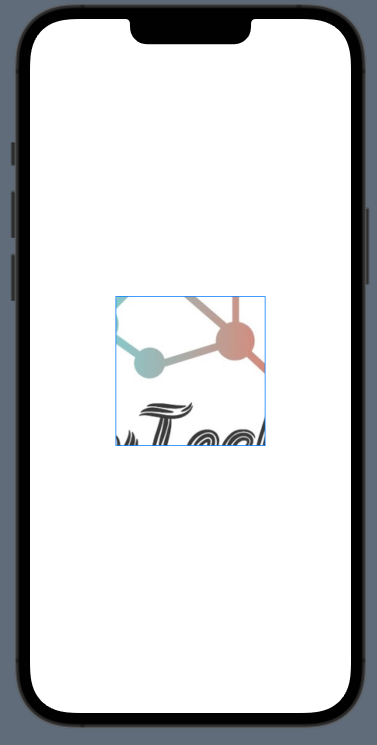
Once clipped modifier is applied, we can only see content of the image that’s present inside the frame.
In order to better see the frame, we will add border around Image view.
struct ImageExample: View {
    var body: some View {
        Image("dt")
            .frame(width: 200, height: 200)
            .clipped()
            .border(Color.blue)
    }
}
SwiftUI Image View: ClipShape
ClipShape
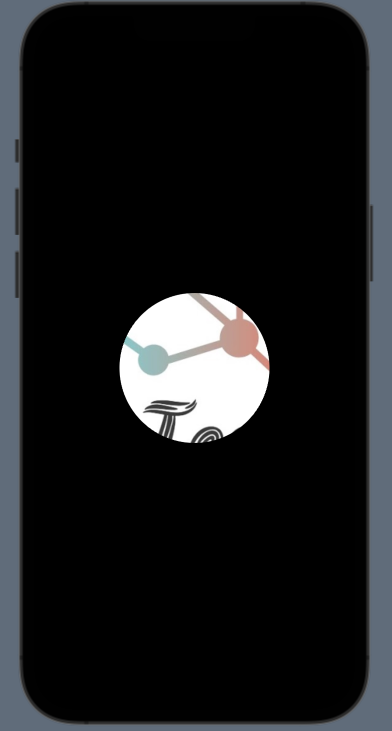
We are not limited to clip image content to a frame rectangle but with the help of .clipShape() modifier, we can clip image to a given shape.
In order to visualize this better, we will apply dark appearance modifier to previewProvider
struct ImageExample: View {
    var body: some View {
        Image("dt")
            .frame(width: 200, height: 200)
            .clipShape(Circle())

    }
}
struct ImageExample_Previews: PreviewProvider {
    static var previews: some View {
        ImageExample()
            .preferredColorScheme(.dark)
    }
}