- Jul 4, 2024
TextRenderer Protocol in iOS 18 & SwiftUI
- DevTechie
- 0 comments
The TextRenderer protocol was introduced with the release of iOS 18 and SwiftUI. This protocol allows us to control how text is rendered within a text view. We use this protocol with the textRenderer() modifier.
Let’s understand this with an example. We will start by creating a simple SwiftUI view.
struct ContentView: View {
    var body: some View {
        VStack {
            Image(systemName: "heart.fill")
                .imageScale(.large)
                .foregroundStyle(.orange.gradient)
            Text("Hello, DevTechie! \nLearn iOS")
                .font(.largeTitle)
                .multilineTextAlignment(.center)
        }
        .padding()
    }
}
Next, we will create a new struct conforming to the TextRenderer protocol. This protocol requires us to implement its draw function, which handles text rendering under the current graphics context.
struct DTTextRenderer: TextRenderer {
    func draw(layout: Text.Layout, in ctx: inout GraphicsContext) {

    }
}
The Text.Layout is a value describing the layout and custom attributes of a tree of Text views. Since it is a sequence type, we can use it to iterate over the lines of text.
struct DTTextRenderer: TextRenderer {
    func draw(layout: Text.Layout, in ctx: inout GraphicsContext) {
        for line in layout {
            ctx.draw(line)
        }
    }
}
Let’s use this customTextRenderer struct with the textRenderer modifier.
struct ContentView: View {
    var body: some View {
        VStack {
            Image(systemName: "heart.fill")
                .imageScale(.large)
                .foregroundStyle(.orange.gradient)
            Text("Hello, DevTechie! \nLearn iOS")
                .font(.largeTitle)
                .multilineTextAlignment(.center)
                .textRenderer(DTTextRenderer())
        }
        .padding()
    }
}
Now when we have our basic setup is ready, we can start applying rendering effects to the text.
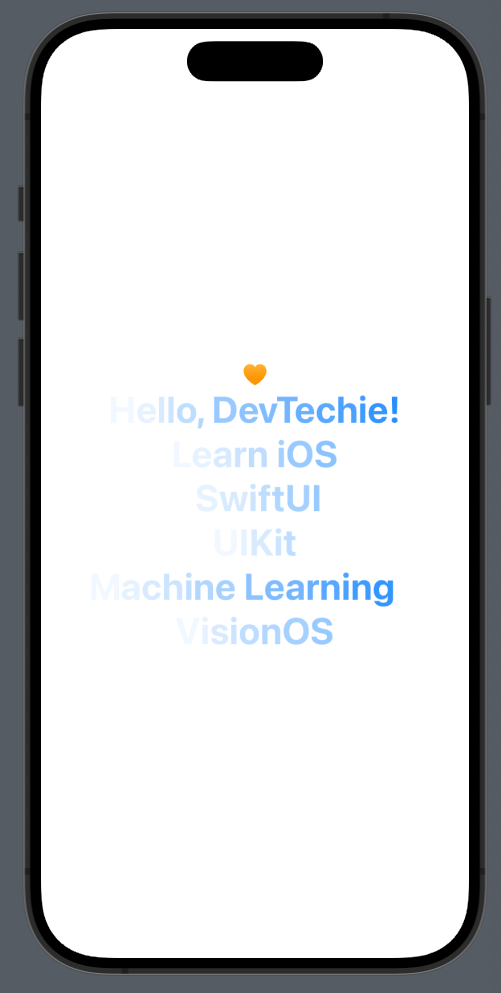
The Text.Layout gives us access to each line so let’s adjust the opacity of each line based on it’s index.
struct DTTextRenderer: TextRenderer {
    func draw(layout: Text.Layout, in ctx: inout GraphicsContext) {
        for (index, line) in layout.enumerated() {
            ctx.opacity = Double(index + 1) * 0.1
            ctx.draw(line)
        }
    }
}
We will need multiple lines of text to see this effect so let’s update the text view.
struct ContentView: View {
    var body: some View {
        VStack {
            Image(systemName: "heart.fill")
                .imageScale(.large)
                .foregroundStyle(.orange.gradient)
            Text("Hello, DevTechie! \nLearn iOS \n SwiftUI \nUIKit \nMachine Learning \nVisionOS")
                .font(.largeTitle)
                .multilineTextAlignment(.center)
                .textRenderer(DTTextRenderer())
        }
        .padding()
    }
}
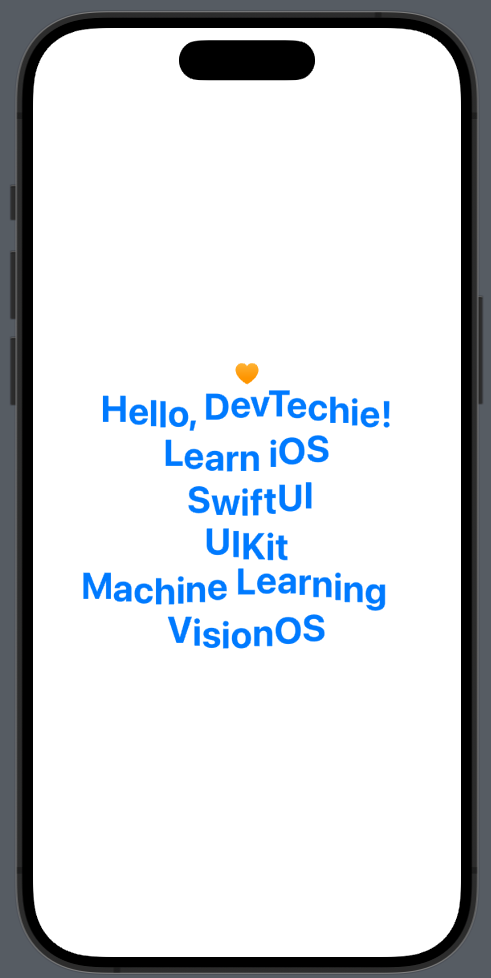
Here, we are adjusting the opacity of the current graphics context and drawing the line under the adjusted context. Let’s also change the color of the text and make it bold to make this effect more prominent.
struct ContentView: View {
    var body: some View {
        VStack {
            Image(systemName: "heart.fill")
                .imageScale(.large)
                .foregroundStyle(.orange.gradient)
            Text("Hello, DevTechie! \nLearn iOS \n SwiftUI \nUIKit \nMachine Learning \nVisionOS")
                .font(.largeTitle.bold())
                .foregroundStyle(.blue)
                .multilineTextAlignment(.center)
                .textRenderer(DTTextRenderer())
        }
        .padding()
    }
}
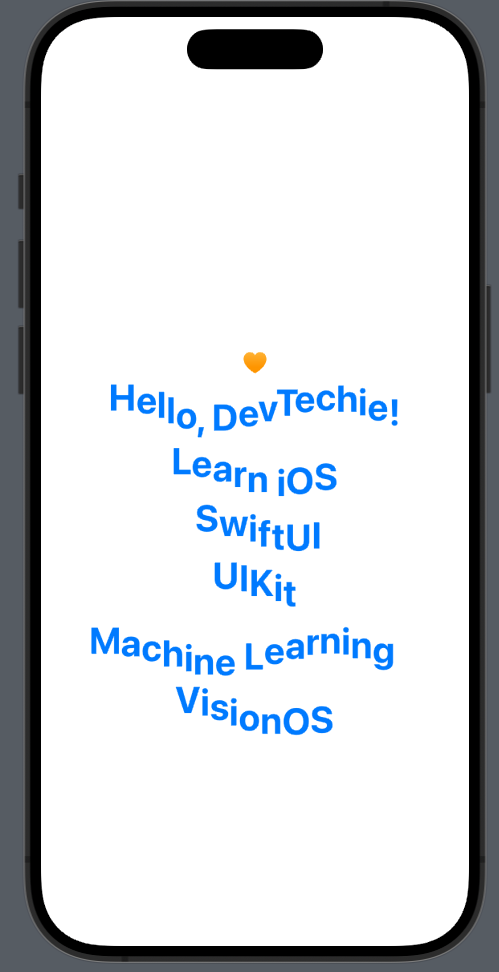
We can apply other effects like rotation to the text.
struct DTTextRenderer: TextRenderer {
    func draw(layout: Text.Layout, in ctx: inout GraphicsContext) {
        for (index, line) in layout.enumerated() {
            ctx.opacity = Double(index) * 0.1
            ctx.rotate(by: Angle(degrees: Double(index) * 1))
            ctx.draw(line)
        }
    }
}
Each line in the text layout is a collection of runs, and runs contain glyphs, which are the characters being rendered on the screen. We can iterate over the runs to gain access to each glyph.
struct DTTextRenderer: TextRenderer {
    func draw(layout: Text.Layout, in ctx: inout GraphicsContext) {
        for line in layout {
            for runs in line {
                for (index, glyph) in runs.enumerated() {
                    ctx.opacity = Double(index + 1) * 0.05
                    ctx.draw(glyph)
                }
            }
        }
    }
}
Using some of the built-in math functions, we can apply some interesting effects to each glyph.
struct DTTextRenderer: TextRenderer {
    func draw(layout: Text.Layout, in ctx: inout GraphicsContext) {
        for line in layout {
            for runs in line {
                for (index, glyph) in runs.enumerated() {
                    ctx.translateBy(x: 0, y: 5 * sin(Double(index) * 0.5))
                    ctx.draw(glyph)
                }
            }
        }
    }
}
Notice that the translation is applied to the entire text because the updated context is being carried over. We can make the translation apply to each line by creating and modifying a local copy of the context.
struct DTTextRenderer: TextRenderer {
    func draw(layout: Text.Layout, in ctx: inout GraphicsContext) {
        for line in layout {
            for runs in line {
                for (index, glyph) in runs.enumerated() {
                    var ctxCopy = ctx
                    ctxCopy.translateBy(x: 0, y: 5.0 * sin(Double(index) * 0.5))
                    ctxCopy.draw(glyph)
                }
            }
        }
    }
}
Once we have the transformation we need to apply to each glyph in the text view, we can animate these values as well.
struct DTTextRenderer: TextRenderer {
    var translation: Double

    var animatableData: Double {
        get { translation }
        set { translation = newValue }
    }

    func draw(layout: Text.Layout, in ctx: inout GraphicsContext) {
        for line in layout {
            for runs in line {
                for (index, glyph) in runs.enumerated() {
                    var ctxCopy = ctx
                    ctxCopy.translateBy(x: 0, y: translation * sin(Double(index) * 0.5))
                    ctxCopy.draw(glyph)
                }
            }
        }
    }
}
struct ContentView: View {
@State private var translation = 5.0
var body: some View {
VStack {
Image(systemName: "heart.fill")
.imageScale(.large)
.foregroundStyle(.orange.gradient)
Text("Hello, DevTechie! \nLearn iOS \n SwiftUI \nUIKit \nMachine Learning \nVisionOS")
.font(.largeTitle.bold())
.foregroundStyle(.blue)
.multilineTextAlignment(.center)
.textRenderer(DTTextRenderer(translation: translation))
.onAppear {
withAnimation(.easeInOut(duration: 2).repeatForever(autoreverses: true)) {
translation = -5.0
}
}
}
.padding()
}
}
The context.draw function provides additional options to make the animated text rendering smoother. Under options for the draw function, we can specify disablesSubpixelQuantization, which disables the subpixel quantization requested by the text engine. This is useful for text that will be animated, as it helps prevent jittering.
struct DTTextRenderer: TextRenderer {
    var translation: Double

    var animatableData: Double {
        get { translation }
        set { translation = newValue }
    }

    func draw(layout: Text.Layout, in ctx: inout GraphicsContext) {
        for line in layout {
            for runs in line {
                for (index, glyph) in runs.enumerated() {
                    var ctxCopy = ctx
                    ctxCopy.translateBy(x: 0, y: translation * sin(Double(index) * 0.5))
                    ctxCopy.draw(glyph, options: .disablesSubpixelQuantization)
                }
            }
        }
    }
}
With that we have reached the end of this article. Thank you once again for reading.