- Jul 16, 2024
Mastering PhotoPicker in SwiftUI
- DevTechie Inc
The PhotosPicker was introduced in SwiftUI with iOS 16 at WWDC 2022. This view allows users to select photos and videos from their photo library within SwiftUI applications.
Let’s understand this with an example. We start by adding the import statement.
import PhotosUI
import SwiftUI
PhotosPicker and its related functionalities are defined inside the PhotosUI framework. This framework contains user interface components for browsing, selecting, and displaying photos and videos from the user’s photo library.
Next, we will create two State variables: one to hold the currently selected item from the PhotosPicker, and the other to hold the processed image.
struct PhotoPickerSwiftUI: View {
    @State private var selectedItem: PhotosPickerItem?
    @State private var photo: Image?
Next, we will create a VStack and add a PhotosPicker view. This view displays a photos picker for choosing assets from the photo library.
This view takes a string key that describes the purpose of showing the picker, a selection parameter to store the item the picker displays in a selected state, and a matching filter to display the types of items that the picker can show.
struct PhotoPickerSwiftUI: View {
    @State private var selectedItem: PhotosPickerItem?
    @State private var photo: Image?

    var body: some View {
        VStack {
            PhotosPicker( "Select a photo",
                selection: $selectedItem,
                matching: .images)
Next, we will add an Image view to show the selected image on our screen.
struct PhotoPickerSwiftUI: View {
    @State private var selectedItem: PhotosPickerItem?
    @State private var photo: Image?

    var body: some View {
        VStack {
            PhotosPicker( "Select a photo",
                selection: $selectedItem,
                matching: .images)

            if let photo {
                photo
                .resizable()
                .scaledToFit()
                .clipShape(.rect(cornerRadius: 20))
                .frame(width: 300, height: 300)
                .shadow(radius: 5)
            }
We will add an onChange modifier to the VStack, which will fire an action when the value of selectedItem changes.
struct PhotoPickerSwiftUI: View {
    @State private var selectedItem: PhotosPickerItem?
    @State private var photo: Image?

    var body: some View {
        VStack {
            PhotosPicker( "Select a photo",
                selection: $selectedItem,
                matching: .images)

            if let photo {
                photo
                .resizable()
                .scaledToFit()
                .clipShape(.rect(cornerRadius: 20))
                .frame(width: 300, height: 300)
                .shadow(radius: 5)
            }
        }
        .onChange(of: selectedItem) { _, _ in
We will use the loadTransferable function from the PhotosPickerItem struct, which loads a Transferable object using the representation of the item by matching content types.
A transferable object refers to an object that can be serialized and deserialized for transfer between different parts of an app or between apps. The Transferable protocol, introduced in iOS 16, allows us to define objects that can be easily shared, transferred, or copied, such as between a photo picker and our app.
Since loadTransferable is an async function call, we will wrap it inside a Task block.
struct PhotoPickerSwiftUI: View {
    @State private var selectedItem: PhotosPickerItem?
    @State private var photo: Image?

    var body: some View {
        VStack {
            PhotosPicker( "Select a photo",
                selection: $selectedItem,
                matching: .images)

            if let photo {
                photo
                .resizable()
                .scaledToFit()
                .clipShape(.rect(cornerRadius: 20))
                .frame(width: 300, height: 300)
                .shadow(radius: 5)
            }
        }
        .onChange(of: selectedItem) { _, _ in
            Task {
                if let loadedImage = try? await selectedItem?.loadTransferable(type: Image.self){
We can use the loadedImage object to set the photo state variable.
struct PhotoPickerSwiftUI: View {
@State private var selectedItem: PhotosPickerItem?
@State private var photo: Image?
var body: some View {
VStack {
PhotosPicker( "Select a photo",
selection: $selectedItem,
matching: .images)
if let photo {
photo
.resizable()
.scaledToFit()
.clipShape(.rect(cornerRadius: 20))
.frame(width: 300, height: 300)
.shadow(radius: 5)
}
}
.onChange(of: selectedItem) { _, _ in
Task {
if let loadedImage = try? await selectedItem?.loadTransferable(type: Image.self){
photo = loadedImage
} else {
print("Failed to load image")
}
}
}
}
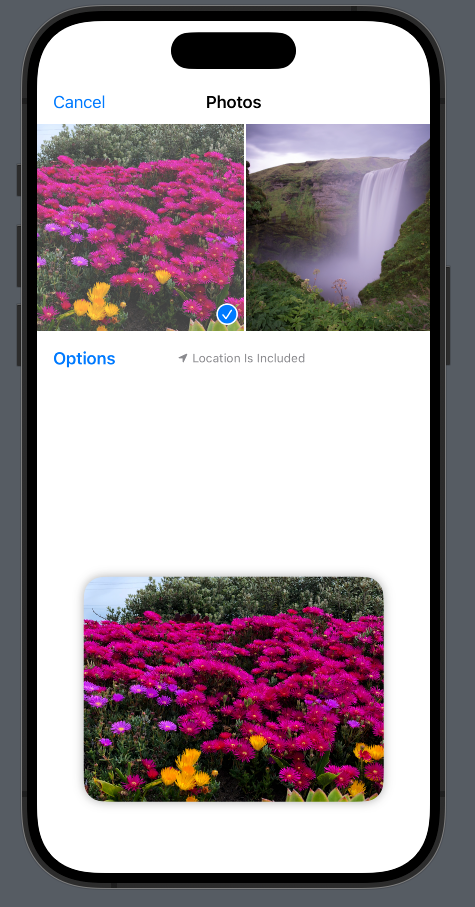
}Launch the app & tap on “Select a photo”.
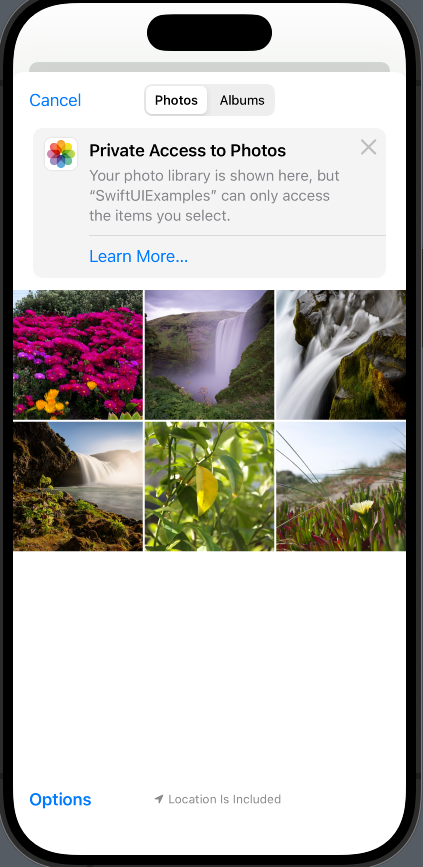
Select a photo from the photo library to display it on the screen.

This looks great, but there is a bug here. Please select the pink flower photo from the simulator.

Notice that its rendered upside down

This happens due to the orientation information for the image. The fix is easy: we just need to load the image data and create an image from a UIImage instance so that the correct orientation information can be populated.
Change the type parameter in the loadTransferable function call to Data.self instead of Image.self.
if let loadedImageData = try? await selectedItem?.loadTransferable(
                    type: Data.self),
We will create a UIImage from the extracted data information of the image.
if let loadedImageData = try? await selectedItem?.loadTransferable(
                    type: Data.self),
                   let uiImage = UIImage(
                    data: loadedImageData
                   )
Once we have the UIImage object from the image data, we can call the Image view’s overloaded initializer to create an Image view from the supplied UIImage object.
photo = Image(
            uiImage: uiImage
        )
The onChange modifier should look like this.
.onChange(of: selectedItem) {_,_ in
            Task {
                if let loadedImageData = try? await selectedItem?.loadTransferable(
                    type: Data.self),
                   let uiImage = UIImage(
                    data: loadedImageData
                   ){
                    photo = Image(
                        uiImage: uiImage
                    )
                } else {
                    print("Failed to load image")
                }
            }
        }
Build and run to see the fixed orientation change.

The PhotosPicker also supports various styles via the photosPickerStyle modifier. We can apply inline or compact photo picker styles. Let’s explore them. First, we will apply the inline photo style.
struct PhotoPickerSwiftUI: View {
    @State private var selectedItem: PhotosPickerItem?
    @State private var photo: Image?

    var body: some View {
        VStack {
            PhotosPicker( "Select a photo",
                          selection: $selectedItem,
                          matching: .images)
            .photosPickerStyle(.inline)

            if let photo {
                photo
                    .resizable()
                    .scaledToFit()
                    .clipShape(.rect(cornerRadius: 20))
                    .frame(width: 300, height: 300)
                    .shadow(radius: 5)
            }
        }
        .onChange(of: selectedItem) {_,_ in
            Task {
                if let loadedImageData = try? await selectedItem?.loadTransferable(
                    type: Data.self),
                   let uiImage = UIImage(
                    data: loadedImageData
                   ){
                    photo = Image(
                        uiImage: uiImage
                    )
                } else {
                    print("Failed to load image")
                }
            }
        }
    }
}
Let’s apply compact style next.
struct PhotoPickerSwiftUI: View {
    @State private var selectedItem: PhotosPickerItem?
    @State private var photo: Image?

    var body: some View {
        VStack {
            PhotosPicker( "Select a photo",
                          selection: $selectedItem,
                          matching: .images)
            .photosPickerStyle(.compact)

            if let photo {
                photo
                    .resizable()
                    .scaledToFit()
                    .clipShape(.rect(cornerRadius: 20))
                    .frame(width: 300, height: 300)
                    .shadow(radius: 5)
            }
        }
        .onChange(of: selectedItem) {_,_ in
            Task {
                if let loadedImageData = try? await selectedItem?.loadTransferable(
                    type: Data.self),
                   let uiImage = UIImage(
                    data: loadedImageData
                   ){
                    photo = Image(
                        uiImage: uiImage
                    )
                } else {
                    print("Failed to load image")
                }
            }
        }
    }
}
Notice that when the compact style is applied, our entire UI is taken over by the photosPicker view, and the view is adjusted to make room for the photo when the selection is made.

We can fix this by setting the frame size for the PhotosPicker view.
struct PhotoPickerSwiftUI: View {
    @State private var selectedItem: PhotosPickerItem?
    @State private var photo: Image?

    var body: some View {
        VStack {
            PhotosPicker( "Select a photo",
                          selection: $selectedItem,
                          matching: .images)
            .photosPickerStyle(.compact)
            .frame(height: 300)

            Spacer()

            if let photo {
                photo
                    .resizable()
                    .scaledToFit()
                    .clipShape(.rect(cornerRadius: 20))
                    .frame(width: 300, height: 300)
                    .shadow(radius: 5)
            }
        }
        .onChange(of: selectedItem) {_,_ in
            Task {
                if let loadedImageData = try? await selectedItem?.loadTransferable(
                    type: Data.self),
                   let uiImage = UIImage(
                    data: loadedImageData
                   ){
                    photo = Image(
                        uiImage: uiImage
                    )
                } else {
                    print("Failed to load image")
                }
            }
        }
    }
}
Let’s also add a placeholder for the image view when photo is not selected by the user.
struct PhotoPickerSwiftUI: View {
    @State private var selectedItem: PhotosPickerItem?
    @State private var photo: Image?

    var body: some View {
        VStack {
            PhotosPicker( "Select a photo",
                          selection: $selectedItem,
                          matching: .images)
            .photosPickerStyle(.compact)
            .frame(height: 300)

            Spacer()

            if let photo {
                photo
                    .resizable()
                    .scaledToFit()
                    .clipShape(.rect(cornerRadius: 20))
                    .frame(width: 300, height: 300)
                    .shadow(radius: 5)
            } else {
                Image(systemName: "photo")
                    .resizable()
                    .frame(height: 300)
                    .padding()
            }
        }
        .onChange(of: selectedItem) {_,_ in
            Task {
                if let loadedImageData = try? await selectedItem?.loadTransferable(
                    type: Data.self),
                   let uiImage = UIImage(
                    data: loadedImageData
                   ){
                    photo = Image(
                        uiImage: uiImage
                    )
                } else {
                    print("Failed to load image")
                }
            }
        }
    }
}
User’s selection should replace the placeholder with the selected photo.
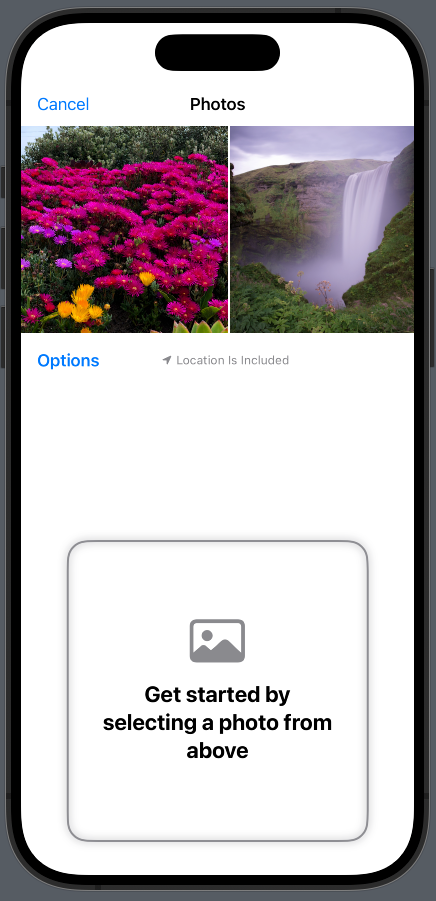
The current placeholder is good, but it can be better. At this point, our UI doesn’t give app users any hint about the actions they need to take when they land on the screen. We can use ContentUnavailableView to not only show the placeholder image but also to add steps they need to take to see the image. Let’s update the code to include ContentUnavailableView.
struct PhotoPickerSwiftUI: View {
    @State private var selectedItem: PhotosPickerItem?
    @State private var photo: Image?

    var body: some View {
        VStack {
            PhotosPicker( "Select a photo",
                          selection: $selectedItem,
                          matching: .images)
            .photosPickerStyle(.compact)
            .frame(height: 300)

            Spacer()

            if let photo {
                photo
                    .resizable()
                    .scaledToFit()
                    .clipShape(.rect(cornerRadius: 20))
                    .frame(width: 300, height: 300)
                    .shadow(radius: 5)
            } else {
                ContentUnavailableView("Get started by selecting a photo from above", systemImage: "photo")
                    .frame(height: 300)
                    .background(
                        RoundedRectangle(
                            cornerRadius: 20
                        ).stroke(
                            .gray,
                            lineWidth: 2
                        ).shadow(
                            color: Color.gray,
                            radius: 4
                        ))
                    .frame(width: 300, height: 300)


            }
        }
        .onChange(of: selectedItem) {_,_ in
            Task {
                if let loadedImageData = try? await selectedItem?.loadTransferable(
                    type: Data.self),
                   let uiImage = UIImage(
                    data: loadedImageData
                   ){
                    photo = Image(
                        uiImage: uiImage
                    )
                } else {
                    print("Failed to load image")
                }
            }
        }
    }
}
So far, we have worked with single selection for photos, but we can add support for multiple selections of photos using the PhotosPicker view. We will make several changes to support multiple photo selection. Let’s start with the state variables.
Since we are dealing with multiple photos, we will change both state variables to be arrays.
struct PhotoPickerSwiftUI: View {
    @State private var selectedItems: [PhotosPickerItem] = []
    @State private var photos: [Image] = []
Next, we will update the photo picker style to inline.
struct PhotoPickerSwiftUI: View {
    @State private var selectedItems: [PhotosPickerItem] = []
    @State private var photos: [Image] = []

    var body: some View {
        VStack {
            PhotosPicker( "Select a photo",
                          selection: $selectedItems,
                          matching: .images)
            .photosPickerStyle(.inline)

            Spacer()
We will create ScrollView to render selected images
struct PhotoPickerSwiftUI: View {
    @State private var selectedItems: [PhotosPickerItem] = []
    @State private var photos: [Image] = []

    var body: some View {
        VStack {
            PhotosPicker( "Select a photo",
                          selection: $selectedItems,
                          matching: .images)
            .photosPickerStyle(.inline)

            Spacer()

            if photos.count > 0 {
                ScrollView(.horizontal) {
                    LazyHStack {
                        ForEach(0..<photos.count, id: \.self) { idx in
                            photos[idx]
                                .resizable()
                                .scaledToFit()
                                .clipShape(.rect(cornerRadius: 20))
                                .frame(width: 300, height: 300)
                                .shadow(radius: 5)
                        }
                    }
                }
            } else {
                ContentUnavailableView("Get started by selecting a photo from above", systemImage: "photo")
                    .frame(height: 300)
                    .background(
                        RoundedRectangle(
                            cornerRadius: 20
                        ).stroke(
                            .gray,
                            lineWidth: 2
                        ).shadow(
                            color: Color.gray,
                            radius: 4
                        ))
                    .frame(width: 300, height: 300)


            }
        }
Let’s also update the onChange modifier to loop over newly received changes and add them to the photos array.
.onChange(of: selectedItems) {_, newValue in

            photos.removeAll()

            newValue.forEach({ selectedItem in
                Task {
                    if let loadedImageData = try? await selectedItem.loadTransferable(
                        type: Data.self),
                       let uiImage = UIImage(
                        data: loadedImageData
                       ){
                        photos.append(Image(
                            uiImage: uiImage
                        ))
                    } else {
                        print("Failed to load image")
                    }
                }
            })
        }
Complete code should look like this
struct PhotoPickerSwiftUI: View {
    @State private var selectedItems: [PhotosPickerItem] = []
    @State private var photos: [Image] = []

    var body: some View {
        VStack {
            PhotosPicker( "Select a photo",
                          selection: $selectedItems,
                          matching: .images)
            .photosPickerStyle(.inline)

            Spacer()

            if photos.count > 0 {
                ScrollView(.horizontal) {
                    LazyHStack {
                        ForEach(0..<photos.count, id: \.self) { idx in
                            photos[idx]
                                .resizable()
                                .scaledToFit()
                                .clipShape(.rect(cornerRadius: 20))
                                .frame(width: 300, height: 300)
                                .shadow(radius: 5)
                        }
                    }
                }
            } else {
                ContentUnavailableView("Get started by selecting a photo from above", systemImage: "photo")
                    .frame(height: 300)
                    .background(
                        RoundedRectangle(
                            cornerRadius: 20
                        ).stroke(
                            .gray,
                            lineWidth: 2
                        ).shadow(
                            color: Color.gray,
                            radius: 4
                        ))
                    .frame(width: 300, height: 300)


            }
        }
        .onChange(of: selectedItems) {_, newValue in

            photos.removeAll()

            newValue.forEach({ selectedItem in
                Task {
                    if let loadedImageData = try? await selectedItem.loadTransferable(
                        type: Data.self),
                       let uiImage = UIImage(
                        data: loadedImageData
                       ){
                        photos.append(Image(
                            uiImage: uiImage
                        ))
                    } else {
                        print("Failed to load image")
                    }
                }
            })
        }
    }
}
This is great, but there is a bug here. Notice that the user has to tap on the “Add” button to see the selected images inside the ScrollView. We can fix this behavior by setting the selectionBehavior parameter under the PhotosPicker view.
   PhotosPicker( "Select a photo",
                          selection: $selectedItems,
                          selectionBehavior: .continuous,
                          matching: .images)
            .photosPickerStyle(.inline)
Other option under selectionBehavior is continuousAndOrdered which shows number of selected photos.
PhotosPicker( "Select a photo",
                          selection: $selectedItems,
                          selectionBehavior: .continuousAndOrdered,
                          matching: .images)
            .photosPickerStyle(.inline)
We can also limit number of items allowed in multiple selection case with the help of maxSelectionCount parameter.
PhotosPicker( "Select a photo",
                          selection: $selectedItems,
                          maxSelectionCount: 3,
                          selectionBehavior: .continuousAndOrdered,
                          matching: .images)
            .photosPickerStyle(.inline)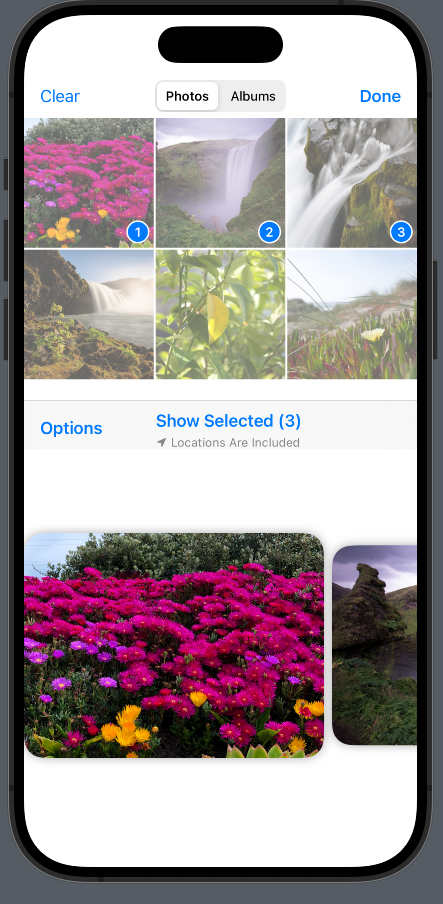
With that we have reached the end of this article. Thank you once again for reading.