- Feb 22
Mastering List Row Spacing in SwiftUI: A Guide to listRowSpacing Modifier
- DevTechie
- SwiftUI
Introduction
When it comes to building elegant and user-friendly interfaces in SwiftUI, developers often find themselves wrestling with the subtle art of spacing and layout. One of the most common challenges developers face is controlling the spacing between rows in lists. Whether you’re building a simple to-do app or a complex data dashboard, proper row spacing can make or break the user experience.
In this comprehensive guide, we’ll dive deep into the listRowSpacing modifier, exploring how to use it effectively to create polished, professional-looking lists in your SwiftUI applications. By the end of this article, you'll have a solid understanding of how to implement and customize row spacing to elevate your SwiftUI designs.
Understanding the listRowSpacing Modifier
The listRowSpacing modifier is a powerful tool in SwiftUI that allows developers to control the vertical spacing between rows in a List. While SwiftUI provides default spacing that works well in most cases, there are situations where you need more precise control over the layout.
Basic Syntax
List {
    // Your list content
}
.listRowSpacing(10)
The modifier accepts a CGFloat value representing the spacing in points. This value determines the distance between each row in your list.
Why Use listRowSpacing?
Enhancing Visual Hierarchy: Proper spacing creates visual separation between elements, making your list easier to scan and understand. When rows are too close together, content can appear cluttered and overwhelming. Conversely, when spacing is too generous, it can make the list feel sparse and disconnected.
2. Improving Readability: Good spacing enhances readability by providing clear boundaries between different pieces of information. This is especially important in data-heavy lists where users need to quickly identify and process information.
3. Creating Consistent Design: Consistent spacing helps maintain a cohesive design language throughout your application, contributing to a more polished and professional appearance.
Practical Examples and Use Cases
Let’s start with a simple example to demonstrate how listRowSpacing works:
struct ContentView: View {
    let items = ["Item 1", "Item 2", "Item 3", "Item 4"]

    var body: some View {
        NavigationStack {
            List(items, id: \.self) { item in
                Text(item)
                    .padding()
            }
            .listRowSpacing(20)
            .navigationTitle("DevTechie.com")
        }

    }
}
In this example, we’ve set the row spacing to 20 points, creating generous gaps between each list item.

The listRowSpacing modifier works with different types of lists:
Plain Lists: These are typically used when you want more control over the appearance
Grouped Lists: These provide a distinct visual style with rounded corners and sections
struct ContentView: View {
    let items = ["Item 1", "Item 2", "Item 3", "Item 4"]

    var body: some View {
        NavigationStack {
            List(items, id: \.self) { item in
                Text(item)
                    .padding()
            }
            .listStyle(.plain)
            .listRowSpacing(20)
            .navigationTitle("DevTechie.com")
        }

    }
}
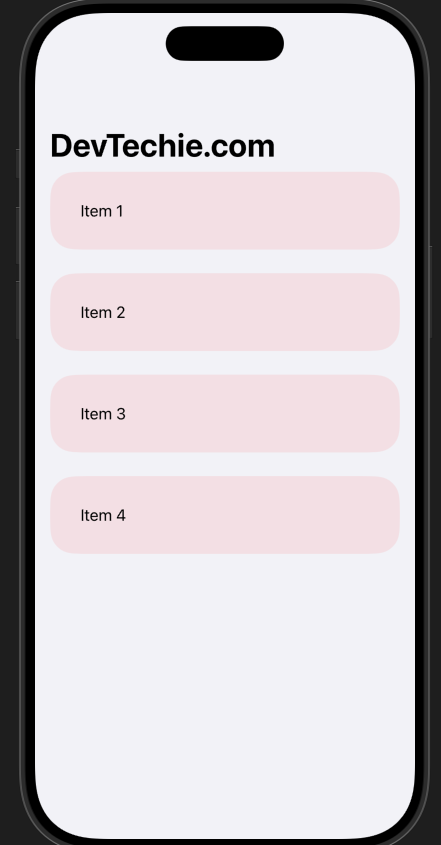
You can combine listRowSpacing with other modifiers to create more complex layouts:
struct ContentView: View {
    let items = ["Item 1", "Item 2", "Item 3", "Item 4"]

    var body: some View {
        NavigationStack {
            List(items, id: \.self) { item in
                Text(item)
                    .padding()
                    .listRowBackground(Color.red.opacity(0.1))
            }
            .listRowSpacing(20)
            .navigationTitle("DevTechie.com")
        }
    }
}
For more sophisticated layouts, you might want to adjust spacing based on screen size or other conditions:
struct ContentView: View {
    let items = ["Item 1", "Item 2", "Item 3", "Item 4"]

    var body: some View {
        NavigationStack {
            List(items, id: \.self) { item in
                Text(item)
                    .padding()
                    .listRowBackground(Color.red.opacity(0.1))
            }
            .listRowSpacing(UIDevice.current.userInterfaceIdiom == .pad ? 20 : 10)
            .navigationTitle("DevTechie.com")
        }
    }
}
You can also implement conditional logic to change spacing based on content or state:
struct ContentView: View {
    @State private var showExtraSpacing = false
    let items = ["Item 1", "Item 2", "Item 3", "Item 4"]

    var body: some View {
        NavigationStack {
            List(items, id: \.self) { item in
                Text(item)
                    .padding()
                    .listRowBackground(Color.red.opacity(0.1))
            }
            .listRowSpacing(showExtraSpacing ? 25 : 10)
            .onTapGesture {
                showExtraSpacing.toggle()
            }
            .navigationTitle("DevTechie.com")
        }
    }
}
Conclusion
The listRowSpacing modifier in SwiftUI is a powerful yet often overlooked tool for creating polished, professional-looking lists. By understanding how to properly implement and customize this modifier, you can significantly improve the visual quality and user experience of your SwiftUI applications.
Remember to:
Use appropriate spacing values that enhance readability and visual hierarchy
Maintain consistency across your application
Test your lists on different devices and screen sizes
Combine the modifier with other SwiftUI tools for maximum effect
Whether you’re building a simple to-do list or a complex data dashboard, mastering listRowSpacing will help you create more engaging and user-friendly interfaces. Start experimenting with different spacing values in your projects, and you'll quickly see the impact it has on your overall design quality.
Ready to elevate your SwiftUI lists? Try implementing listRowSpacing in your next project and see how it transforms your user interface!
Learn more at https://www.devtechie.com