- Jul 8, 2025
iOS 17 Observation Framework: A Modern Approach to State Management with @Observable
- DevTechie Inc
Key Advantages
The Observation framework offers several compelling benefits:
Reduced Boilerplate: Eliminates the need for @Published property wrappers and manual publisher management
Better Performance: More efficient change tracking and notification system with granular observation
Type Safety: Compile-time guarantees for observable properties without protocol conformance overhead
Simplified Architecture: Reduces coupling between observable objects and their observers
Automatic Dependency Tracking: SwiftUI automatically tracks which properties your views depend on, updating only when necessary
Moving from ObservableObject to Observation
When migrating from Combine backed ObservableObject to the Observation framework, several changes are essential:
1. @Published Properties → Regular Properties
Before (Combine):
class ExpenseStore: ObservableObject {
    @Published var expenses: [Expense] = []
    @Published var searchText: String = ""
    @Published var isLoading: Bool = false
}
After (Observation):
@Observable
class ExpenseStore {
    var expenses: [Expense] = []
    var searchText: String = ""
    var isLoading: Bool = false
}
With the introduction of Observation framework, the @Observable macro automatically generates the necessary infrastructure to support observation, removing the need for manually wrapping properties with @Published. This streamlines your code, as the framework takes care of change notifications behind the scenes. Unlike @Published, which creates a separate Publisher for each property and increases memory overhead, @Observable is more efficient and lightweight. Additionally, it eliminates the need to explicitly call objectWillChange.send(), simplifying reactive programming in Swift even further.
2. @StateObject → @State
Before (Combine):
struct ContentView: View {
    @StateObject private var expenseStore = ExpenseStore()

    var body: some View {
        // View content
    }
}
After (Observation):
struct ContentView: View {
    @State private var expenseStore = ExpenseStore()

    var body: some View {
        // View content
    }
}
The StateObject was originally designed to manage the lifecycle of types conforming to ObservableObject. However, with the introduction of the @Observable macro and automatic observation, @State now works seamlessly with @Observableclasses as well. This leads to a simplified ownership model, where there's no longer a need to distinguish between state objects and regular state. As a result, SwiftUI can more effectively optimize state management, leading to improved performance and cleaner, more maintainable code.
3. @ObservedObject → @Bindable
Before (Combine):
struct ExpenseDetailView: View {
    @ObservedObject var expense: Expense

    var body: some View {
        TextField("Name", text: $expense.name)
    }
}
After (Observation):
struct ExpenseDetailView: View {
    @Bindable var expense: Expense

    var body: some View {
        TextField("Name", text: $expense.name)
    }
}
When working with @Observable types, there's no need to use @ObservedObject anymore. Instead, Swift now provides @Bindable, which enables two-way binding capabilities for observable objects. This approach is more explicit about your intent—you're not just observing changes, you're actively creating bindings. Additionally, it offers better performance by avoiding the creation of unnecessary observation relationships, resulting in more efficient and predictable UI updates.
Building an Expense Tracking App
Let’s explore the Observation framework by building a practical expense tracking application that demonstrates its capabilities.
Data Model Implementation
We’ll start with a basic expense model. Initially, this class won’t work directly with SwiftUI because the properties aren’t bindable:
final class Expense: Identifiable {
    var id: UUID = UUID()
    var name: String
    var amount: Int

    init(name: String = "", amount: Int = 0) {
        self.name = name
        self.amount = amount
    }
}
To make this model observable, we need to import the Observation framework and apply the @Observable macro:
import Observation
@Observable
final class Expense: Identifiable {
    var id: UUID = UUID()
    var name: String
    var amount: Int

    init(name: String = "", amount: Int = 0) {
        self.name = name
        self.amount = amount
    }
}
Advanced Observable Store
Let’s create a more comprehensive store that demonstrates the power of the Observation framework:
@Observable
final class ExpenseStore {
    var expenses: [Expense] = []
    var searchText: String = ""
    var isLoading: Bool = false

    // Computed properties are automatically observable
    var filteredExpenses: [Expense] {
        var filtered = expenses

        if !searchText.isEmpty {
            filtered = filtered.filter { $0.name.localizedCaseInsensitiveContains(searchText) }
        }

        return filtered
    }

    var totalAmount: Int {
        filteredExpenses.reduce(0) { $0 + $1.amount }
    }

    var averageExpense: Double {
        guard !filteredExpenses.isEmpty else { return 0 }
        return Double(totalAmount) / Double(filteredExpenses.count)
    }

    // Async methods work seamlessly
    func loadExpenses() async {
        isLoading = true
        defer { isLoading = false }

        // Simulate network call
        try? await Task.sleep(for: .seconds(1))

        // Update will automatically notify observers
        expenses = [
            Expense(name: "Coffee", amount: 5),
            Expense(name: "Lunch", amount: 12),
            Expense(name: "Gas", amount: 45)
        ]
    }
}
Creating the SwiftUI View
Now let’s build our expense tracking interface. Let’s first create a reusable component for the expense row:
struct ExpenseRow: View {
    let expense: Expense

    var body: some View {
        HStack {
            VStack(alignment: .leading, spacing: 4) {
                Text(expense.name)
                    .font(.headline)
                    .foregroundStyle(.primary)

                Text("Expense")
                    .font(.caption)
                    .foregroundStyle(.secondary)
            }

            Spacer()

            Text(expense.amount.formatted(.currency(code: "USD")))
                .font(.title3)
                .fontWeight(.medium)
                .foregroundStyle(.primary)
        }
        .padding(.vertical, 4)
    }
}
Next, build a view to list all the current expenses along with a section to add new expenses:
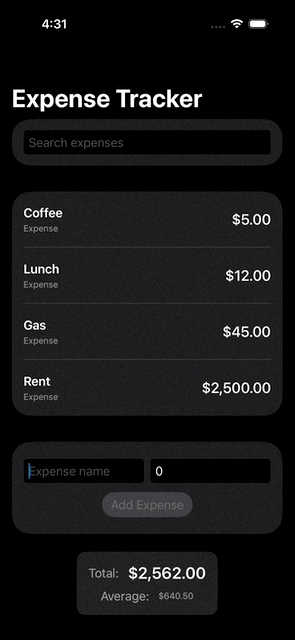
struct ExpenseTracker: View {
    @State private var expenseStore = ExpenseStore()
    @State private var newExpense = Expense()

    var body: some View {
        NavigationStack {
            List {
                searchSection
                expenseList
                addExpenseSection
            }
            .navigationTitle("Expense Tracker")
            .safeAreaInset(edge: .bottom) {
                totalExpenseView
            }
            .task {
                await expenseStore.loadExpenses()
            }
        }
    }

    // MARK: - View Components

    @ViewBuilder
    private var searchSection: some View {
        Section {
            TextField("Search expenses", text: $expenseStore.searchText)
                .textFieldStyle(.roundedBorder)
        }
    }

    @ViewBuilder
    private var expenseList: some View {
        ForEach(expenseStore.filteredExpenses) { expense in
            ExpenseRow(expense: expense)
        }
        .onDelete(perform: deleteExpenses)
    }

    @ViewBuilder
    private var addExpenseSection: some View {
        Section {
            VStack(spacing: 12) {
                HStack {
                    TextField("Expense name", text: $newExpense.name)
                        .textFieldStyle(.roundedBorder)

                    TextField("Amount", value: $newExpense.amount, format: .number)
                        .textFieldStyle(.roundedBorder)
                        .keyboardType(.numberPad)
                }

                Button("Add Expense") {
                    addExpense()
                }
                .buttonStyle(.borderedProminent)
                .disabled(newExpense.name.isEmpty || newExpense.amount <= 0)
            }
            .padding(.vertical, 8)
        }
    }

    @ViewBuilder
    private var totalExpenseView: some View {
        VStack(spacing: 8) {
            HStack {
                Text("Total: ")
                    .foregroundStyle(.secondary)

                Text(expenseStore.totalAmount.formatted(.currency(code: "USD")))
                    .font(.title2)
                    .fontWeight(.semibold)
                    .foregroundStyle(.primary)
            }

            HStack {
                Text("Average: ")
                    .foregroundStyle(.secondary)

                Text(expenseStore.averageExpense.formatted(.currency(code: "USD")))
                    .font(.caption)
                    .foregroundStyle(.secondary)
            }
        }
        .padding()
        .background(.regularMaterial, in: RoundedRectangle(cornerRadius: 12))
        .padding(.horizontal)
    }

    // MARK: - Actions

    private func addExpense() {
        guard !newExpense.name.isEmpty, newExpense.amount > 0 else { return }

        expenseStore.expenses.append(newExpense)
        newExpense = Expense()
    }

    private func deleteExpenses(at offsets: IndexSet) {
        let filteredExpenses = expenseStore.filteredExpenses
        let expensesToDelete = offsets.map { filteredExpenses[$0] }

        expenseStore.expenses.removeAll { expense in
            expensesToDelete.contains { $0.id == expense.id }
        }
    }
}
Observation Benefits
Granular Observation
The Observation framework provides significant performance improvements through granular observation:
@Observable
class UserProfile {
    var name: String = ""
    var email: String = ""
    var avatar: UIImage? = nil
    var preferences: UserPreferences = UserPreferences()
}

struct ProfileView: View {
    @State private var profile = UserProfile()

    var body: some View {
        VStack {
            // This view only updates when 'name' changes
            Text("Hello, \(profile.name)")

            // This view only updates when 'email' changes
            Text(profile.email)
        }
    }
}
With Observable, SwiftUI now tracks exactly which properties each view depends on, allowing for more precise and efficient updates. When a property changes, only the views that rely on that specific property are re-rendered, avoiding unnecessary updates across the UI. This improves performance and eliminates the redundant re-renders that often occurred with @Published. Additionally, SwiftUI manages memory more effectively by automatically cleaning up observers, resulting in a leaner and more responsive app architecture.
Reduced Memory Footprint
Before (Combine)
// Each @Published property creates a Publisher
class ExpenseStore: ObservableObject {
    @Published var expenses: [Expense] = []           // Creates PassthroughSubject
    @Published var searchText: String = ""            // Creates PassthroughSubject
    @Published var isLoading: Bool = false            // Creates PassthroughSubject
    @Published var selectedCategory: Category = .all  // Creates PassthroughSubject

    // 4 Publishers + ObjectWillChange Publisher = 5 total publishers
}
After (Observation)
// Single observation mechanism
@Observable
class ExpenseStore {
    var expenses: [Expense] = []
    var searchText: String = ""
    var isLoading: Bool = false
    var selectedCategory: Category = .all

    // Single, efficient observation system
}
Best Practices and Considerations
When to Use @Observable vs @ObservableObject
Use @Observable when:
Building new iOS 17+ applications
You want better performance and less boilerplate
Working with simple to moderate state complexity
You need granular observation capabilities
Stick with @ObservableObject when:
Supporting iOS versions below 17
You have complex publisher chains that are difficult to migrate
Working with third-party libraries that expect ObservableObject
Conclusion
The Observation framework in iOS 17 represents a significant step forward in Swift’s reactive programming capabilities. By eliminating boilerplate code, improving performance, and providing better type safety, it makes building reactive SwiftUI applications more straightforward and maintainable.
Key Takeaways:
Replace @Published with regular properties in @Observable classes for automatic change tracking
Use @State instead of @StateObject for better performance and simplified ownership
Use @Bindable instead of @ObservedObject when you need two-way binding
Leverage automatic dependency tracking for granular updates and better performance
Migrate gradually by converting one store at a time
Consider iOS version requirements when planning your migration strategy
This modern approach to state management will help you build more efficient and maintainable iOS applications while reducing complexity and improving developer experience. The Observation framework represents the future of reactive programming in SwiftUI, offering a cleaner, more performant alternative to traditional Combine-based solutions.