- May 7
How to Use Azure Translator Service in a .NET Core Application to translate a text into a another language.
- DevTechie
- AI
Azure Translator is a powerful cloud-based service that enables developers to translate text into multiple languages with ease. In this article, we’ll walk through:
1. What needs to be done at Azure
2. What needs to be done at the .NET Core side
3. How to test the application
Setting Up Azure Translator
Before writing any code, you need to configure the Translator resource in Azure.
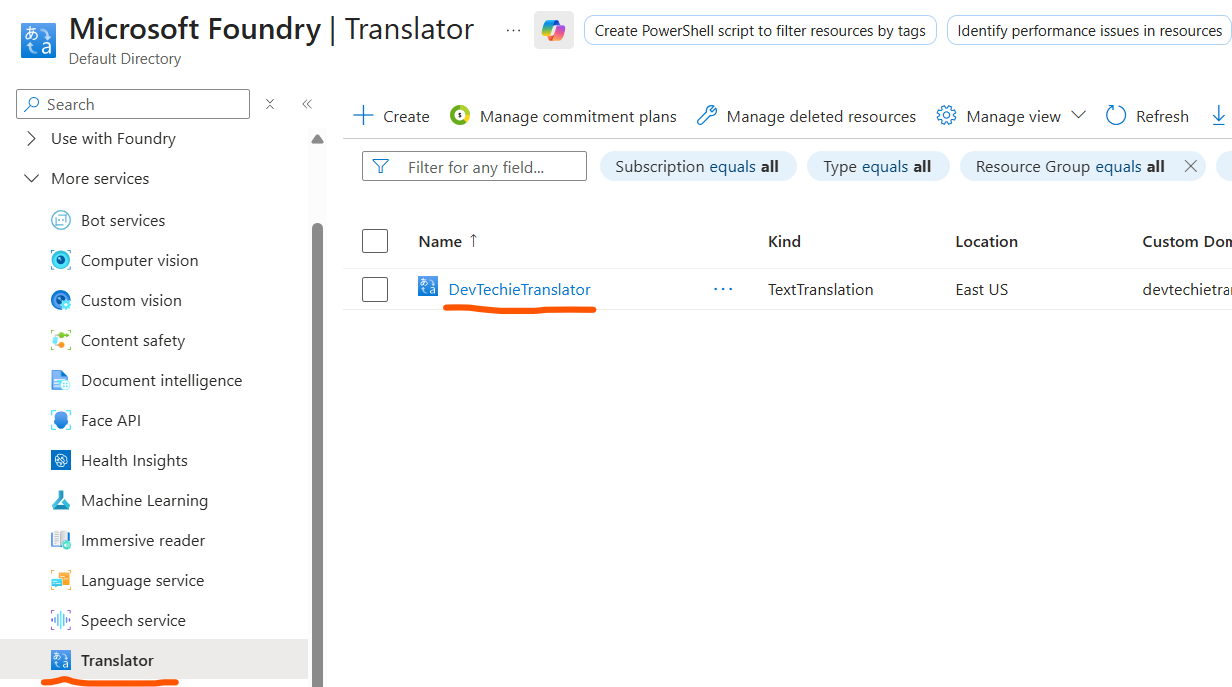
Step 1: Create a Translator Resource
• Log in to the Azure Portal.
• Microsoft Foundry.
• Click Create and fill in:
• Subscription: Choose your Azure subscription.
• Resource Group: Create or select an existing group.
• Region: Example: .
• Pricing Tier: Start with (free) or for production.
In the below screenshot I already had created one for myself.
Press enter or click to view image in full size
Press enter or click to view image in full size
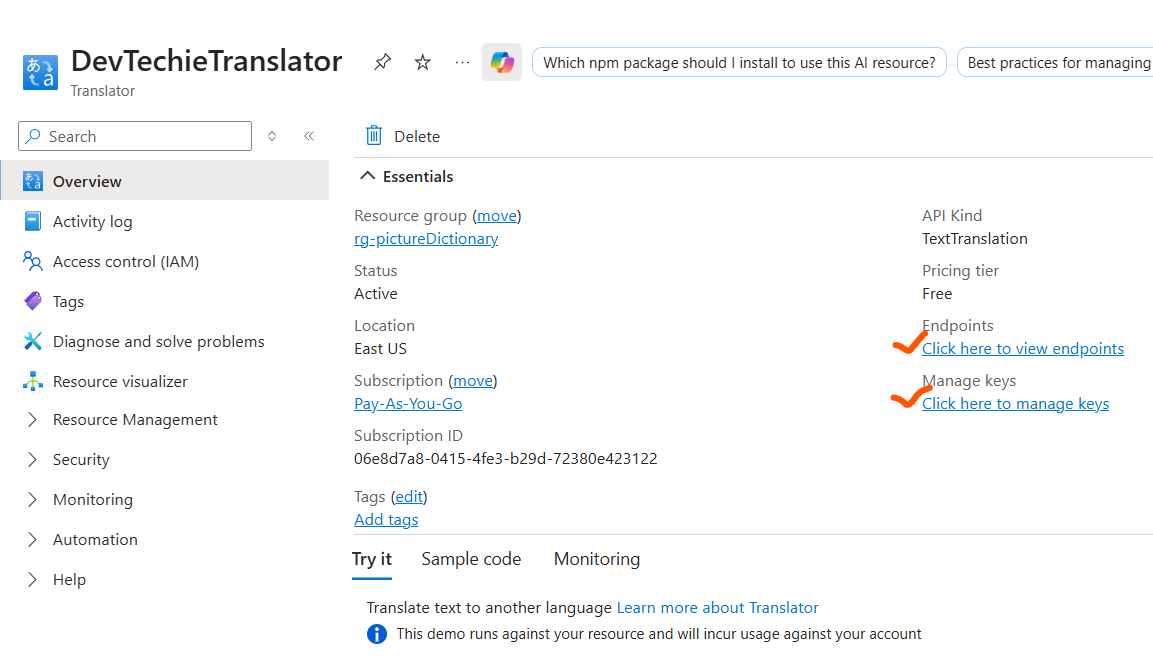
Step 2: Retrieve Keys and Endpoint
• Navigate to your Translator resource.
• Go to Keys and Endpoint.
• Copy:
• Subscription Key
• Endpoint URL
• Region (e.g., )
Step 3: Secure Your Keys
• Store keys in Azure Key Vault or configuration files ().
• Avoid hardcoding them directly in your code.
Implementing Translator in .NET Core
The code provided below demonstrates the integration. Let’s break it down:
Step 1: Define Request Model
public class TranslateTextRequest
{
    public string TextToTranslate { get; set; }
    public string TargetLanguage { get; set; }
}
Step 2: Create Controller Endpoint
[HttpPost("translate-text")]
public async Task<IActionResult> TranslateText([FromBody] TranslateTextRequest request)
{
    if (request == null || string.IsNullOrWhiteSpace(request.TextToTranslate))
        return BadRequest("Text to translate is required.");
try
{
string targetLanguage = string.IsNullOrWhiteSpace(request.TargetLanguage) ? "fr" : request.TargetLanguage; var transEndpoint = AzureAIConstants.TranslatorTestEndpoint;
var transKey = AzureAIConstants.TranslatorKey;
var region = "eastus"; string route = $"/translate?api-version=3.0&to={targetLanguage}";
var body = new object[] { new { Text = request.TextToTranslate } };
var requestBody = JsonSerializer.Serialize(body); using var transRequest = new HttpRequestMessage
{
Method = HttpMethod.Post,
RequestUri = new Uri(transEndpoint + route),
Content = new StringContent(requestBody, Encoding.UTF8, "application/json")
}; transRequest.Headers.Add("Ocp-Apim-Subscription-Key", transKey);
transRequest.Headers.Add("Ocp-Apim-Subscription-Region", region); var httpClient = new HttpClient();
var transResponse = await httpClient.SendAsync(transRequest); if (!transResponse.IsSuccessStatusCode)
{
var errorContent = await transResponse.Content.ReadAsStringAsync();
return StatusCode((int)transResponse.StatusCode, $"Translation API error: {errorContent}");
} var transResult = await transResponse.Content.ReadAsStringAsync();
var jsonResult = JsonDocument.Parse(transResult); var translatedText = jsonResult.RootElement[0]
.GetProperty("translations")[0]
.GetProperty("text")
.GetString(); return Ok(new
{
originalText = request.TextToTranslate,
translatedText = translatedText,
targetLanguage = targetLanguage
});
}
catch (Exception ex)
{
return StatusCode(500, $"Error during translation: {ex.Message}");
}
}Step 3: Best Practices
• Use for better resource management.
• Log errors with .
• Store keys securely in or Key Vault.
Testing the Application
Step 1: Run the API
1. Start your .NET Core app.
2. Ensure the endpoint is available.
Step 2: Send a Request (Postman or curl)
POST https://localhost:5001/translate-text
Content-Type: application/json
{
"textToTranslate": "Hello, how are you?",
"targetLanguage": "es"
}Step 3: Expected Response
{
  "originalText": "Hello, how are you?",
  "translatedText": "Hola, ¿cómo estás?",
  "targetLanguage": "es"
}
Step 4: Edge Cases
• Missing targetLanguage → Defaults to French.
• Empty textToTranslate → Returns “Text to translate is required.”.
• Invalid language code → API returns error message.
✅ Conclusion
By setting up the Translator resource in Azure, wiring up the API call in .NET Core, and testing with Postman, you can seamlessly translate text into any supported language. This approach is secure, scalable, and can be extended to support advanced scenarios like language detection, batch translations, or chatbot integration.
Visit us at https://www.devtechie.com