- Nov 6, 2024
Auto Save Records in SwiftData & SwiftUI
- DevTechie Inc
SwiftData simplifies data persistence by handling tasks in the background for us. One of its features is the convenience of automatically saving a record when it’s added or changed in the model context.
The auto saving feature is on by default, meaning changes in the model context are automatically saved. But what if we want more control? In some cases, our apps may need the option to commit changes manually, giving users the chance to undo or redo before saving the data into the data store.
Let’s explore how the auto saving works and how disabling it gives us greater control over the persisted data.
We will look at the pantry management example to understand the concept better.
PantryItem model:
import Foundation
import SwiftData
import SwiftUI

@Model
class PantryItem {
    var name: String
    var quantity: String
    var expirationDate: Date?

    init(name: String, quantity: String, expirationDate: Date? = nil) {
        self.name = name
        self.quantity = quantity
        self.expirationDate = expirationDate
    }
}
extension PantryItem {
    var displayExpDate: String {
        guard let expDate = expirationDate else {
            return ""
        }
        if expDate <= Date() {
            return "Expired on " + expDate.formatted(date: .numeric, time: .omitted)
        } else if expDate > Date() {
            return "Will expire on " + expDate.formatted(date: .numeric, time: .omitted)
        }
        return ""
    }

    var displayExpColor: Color {
        guard let expDate = expirationDate else {
            return .clear
        }
        if expDate <= Date() {
            return .pink
        } else if expDate > Date() {
            return .mint
        }
        return .gray
    }
}
// MARK: Preview Sample Data
extension PantryItem {
    @MainActor
    static var mockData: ModelContainer {
        let container = try! ModelContainer(for: PantryItem.self, configurations: ModelConfiguration(isStoredInMemoryOnly: true))

        let dateFormatter = DateFormatter()
        dateFormatter.dateFormat = "MM/dd/yy"

        container.mainContext.insert(PantryItem(name: "Olive Oil", quantity: "1 Gallon", expirationDate: dateFormatter.date(from: "04/11/24")))

        container.mainContext.insert(PantryItem(name: "Pasta", quantity: "1/4 lbs", expirationDate: dateFormatter.date(from: "03/11/24")))

        container.mainContext.insert(PantryItem(name: "Snack", quantity: "1 pack", expirationDate: dateFormatter.date(from: "04/28/24")))

        return container
    }
}
AddUpdatePantryItem view
import SwiftUI
import SwiftData

struct AddUpdatePantryItem: View {
  @Environment(\.modelContext) private var modelContext
  @Environment(\.dismiss) private var dismiss
  @State private var name: String = ""
  @State private var quantity: String = ""
  @State private var expirationDate: Date = Date()
  // State property to update selected item
  @State private var selectedPantryItem: PantryItem?

  init(item: PantryItem? = nil) {
    if let item {
      _selectedPantryItem = State(initialValue: item)

      _name = State(initialValue: item.name)
      _quantity = State(initialValue: item.quantity)
      _expirationDate = State(initialValue: item.expirationDate ?? Date())

    }
  }

  var body: some View {
      Form {
        TextField("Item name", text: $name)
        TextField("Quantity", text: $quantity)
        DatePicker("Expiration Date", selection: $expirationDate, displayedComponents: .date)

        HStack {
          Button(role: .destructive) {
            dismiss()
          } label: {
            Text("Cancel")
          }
          Spacer()
          Button("Save") {
            if let selectedPantryItem {
              selectedPantryItem.name = name
              selectedPantryItem.quantity = quantity
              selectedPantryItem.expirationDate = expirationDate
            } else {
              let item = PantryItem(name: name, quantity: quantity, expirationDate: expirationDate)

              modelContext.insert(item)
            }

            dismiss()
          }
        }
        .buttonStyle(.borderedProminent)
      }
      .navigationTitle((selectedPantryItem != nil) ? "Update \(name)" : "New Pantry Item")
  }
}
#Preview {
  AddUpdatePantryItem()
}
PantryListView view
import SwiftUI
import SwiftData

struct PantryListView: View {
  @Environment(\.modelContext) private var modelContext
  @Query(sort: \PantryItem.expirationDate) private var items: [PantryItem]

  @State private var launchInsetNewView = false

  var body: some View {
    NavigationStack {
      List {
        ForEach(items) { item in
          NavigationLink(value: item) {
            VStack(alignment: .leading) {
              Text(item.name)
                .font(.title3.bold())

              HStack {
                Text(item.quantity)
                Spacer()
                Text(item.displayExpDate)
                  .padding(5)
                  .foregroundStyle(.white)
                  .background(item.displayExpColor, in: .capsule)
              }
              .font(.subheadline)
            }
          }
        }
      }
      .navigationDestination(for: PantryItem.self) { value in
        AddUpdatePantryItem(item: value)
      }
      .navigationTitle("Pantry Item List")
      .toolbar {
        ToolbarItem(placement: .topBarTrailing) {
          Button {
            launchInsetNewView.toggle()
          } label: {
            Image(systemName: "plus.circle.fill")
              .font(.title)
          }
          .sheet(isPresented: $launchInsetNewView) {
            NavigationStack {
              AddUpdatePantryItem()
            }
            .presentationDetents([.medium])
          }
        }
      }
    }
  }
}
#Preview {
  PantryListView()
    .modelContainer(PantryItem.mockData)
}
PantryExampleApp file
import SwiftUI
import SwiftData
@main
struct PantryExampleApp: App {
var body: some Scene {
WindowGroup {
ContentView()
}
.modelContainer(for: PantryItem.self)
}
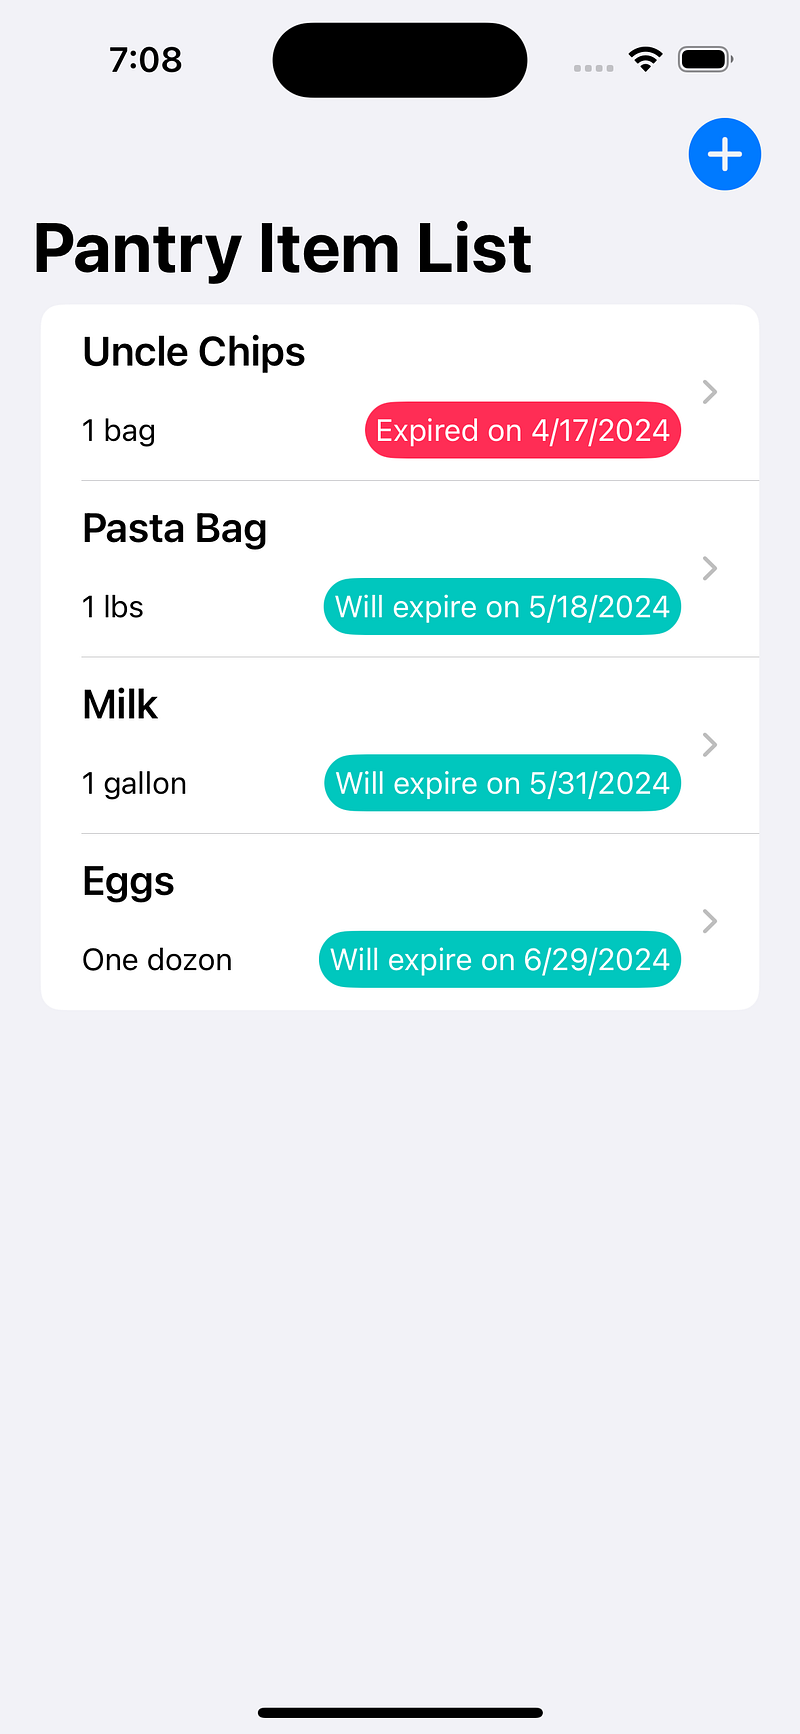
}If we run the app now and make changes, we’ll see that all the changes are automatically saved each time the app is launched.
We have added few items with expired dates and then changed chips and pasta entries for new expiration dates.
Launching the app will show that our changes persist across app launches.
Now, let’s change the app file to disable the autosave feature.
@main
struct PantryExampleApp: App {
var body: some Scene {
WindowGroup {
ContentView()
}
.modelContainer(for: PantryItem.self, isAutosaveEnabled: false)
}
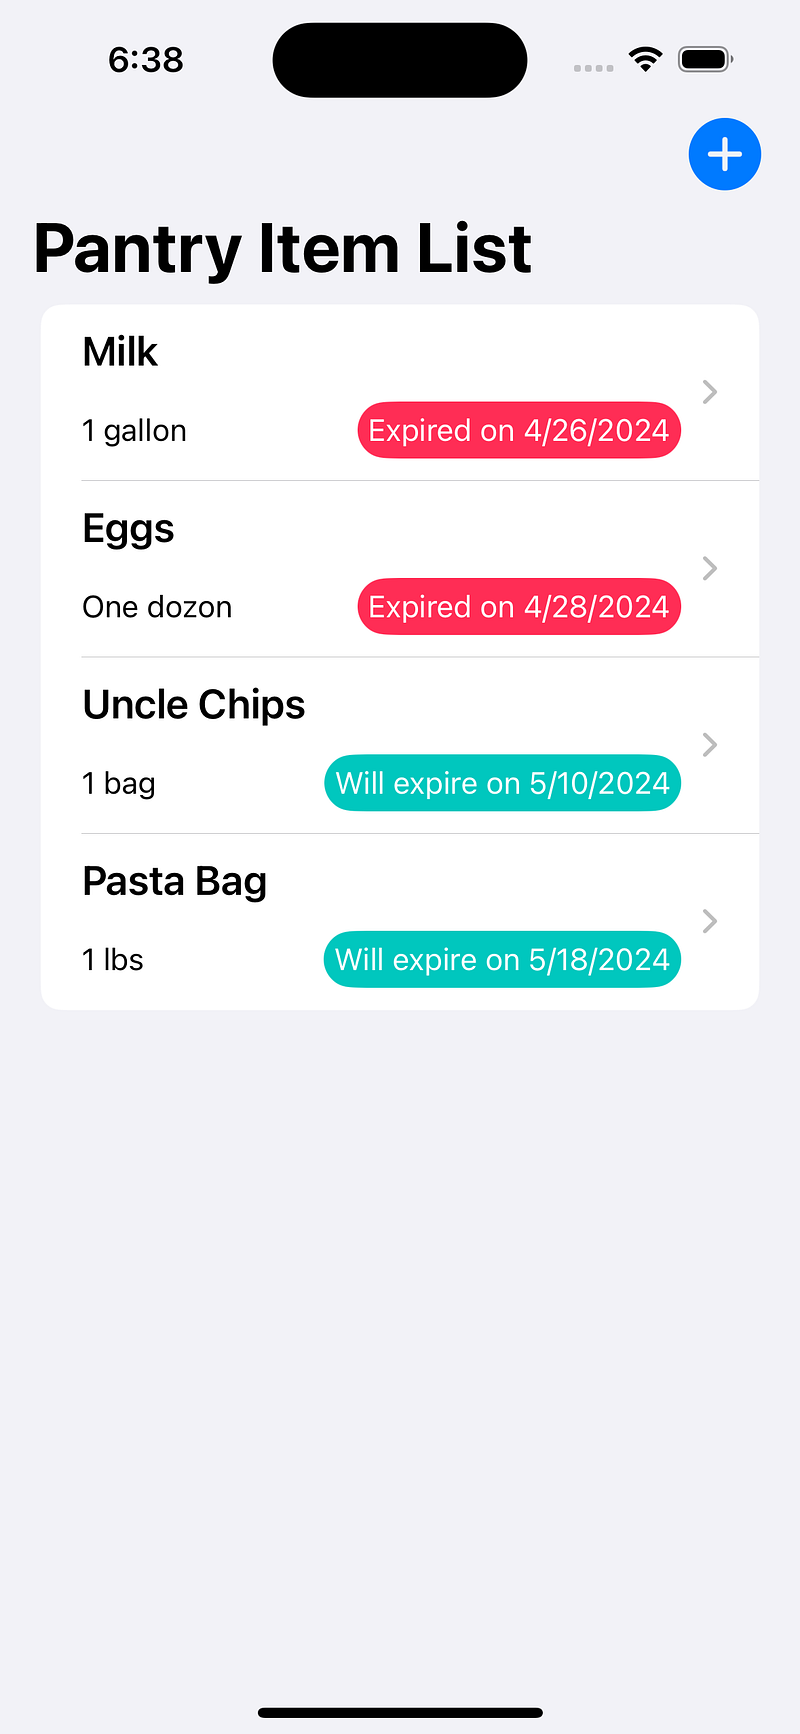
}Build and run the app, add items and make some changes. Then, rerun the app to see if the changes have persisted. We’ve updated items to ensure none of them are expired.

Build and run the app from Xcode again, and you’ll notice that none of the changes we made persisted to the data store. This is because we’ve disabled the autosave feature.

You might be wondering why the app indicated that all changes were successfully made, yet they didn’t carry over to the next launch. The reason is that when we made the changes, they were only staged at the modelContext level but weren’t instructed to persist in the backing data store. So, the changes remained in memory. However, during the next app launch, the memory was cleared, causing all changes to be lost.
Disabling the autosave feature means we’re responsible for ensuring all changes persist to the data store. This can be achieved by simply calling the modelContext.save() function wherever we are making changes.
Let’s update the save button logic in the AddUpdatePantryItem view to ensure that changes persist to the data store. After the if-else statement, we’ll call modelContext.save() function. Since it can throw an exception, we’ll wrap the call inside a do-try-catch block.
Button("Save") {
            if let selectedPantryItem {
              selectedPantryItem.name = name
              selectedPantryItem.quantity = quantity
              selectedPantryItem.expirationDate = expirationDate
            } else {
              let item = PantryItem(name: name, quantity: quantity, expirationDate: expirationDate)

              modelContext.insert(item)
            }

            do {
              try modelContext.save()
            } catch {
              print(error.localizedDescription)
            }

            dismiss()
          }
Build and run again, and you’ll observe that this time, all of our changes will persist between app launches.

We disabled the autoSave feature using the modelContainer modifier inside the app file. However, in reality, that setting exists inside the ModelContext. The modelContainer modifier simply offers a convenient way to toggle the behavior.
To set the autoSave from ModelContext, we need to create a container object to access its modelContext and make the change.
Head over to the PantryExampleApp file and make the change
@main
struct PantryExampleApp: App {

  @MainActor
  var appContainer: ModelContainer {
    let container = try! ModelContainer(for: Schema([PantryItem.self]))
    container.mainContext.autosaveEnabled = false
    return container
  }

  var body: some Scene {
    WindowGroup {
      ContentView()
    }
    //.modelContainer(for: PantryItem.self, isAutosaveEnabled: false)
    .modelContainer(appContainer)
  }
}
Build and run the app to observe that it functions the same way.