- Feb 24
A Developer's Guide to Canvas in SwiftUI for Custom Drawing
- DevTechie
- SwiftUI
SwiftUI has revolutionized UI development with its declarative syntax, making it incredibly intuitive to build beautiful interfaces. However, if you’ve ever tried to create complex, highly custom graphics — think intricate data visualizations, interactive drawing apps, or unique game elements — you might have found yourself bumping into the limitations of standard Shape views like Circle, Rectangle, and Path. While Path offers a good degree of freedom, rendering numerous complex paths can sometimes lead to performance hiccups, and managing a highly dynamic drawing scene can become cumbersome.
Enter Canvas in SwiftUI. Introduced in iOS 15, macOS 12, and watchOS 8, the Canvas view is SwiftUI's powerful answer to immediate mode drawing. It provides a dedicated, high-performance context for rendering custom graphics, images, and text with a level of control and flexibility that was previously challenging to achieve directly in SwiftUI.
Imagine having a blank canvas, not just for predefined shapes, but for truly bespoke artistry. That’s what Canvas offers: a direct pipeline to the rendering engine, allowing you to draw virtually anything you can conceive, pixel by pixel if you wish. In this comprehensive guide, we'll dive deep into Canvas, exploring its capabilities, demonstrating its usage with practical code examples, and equipping you with the knowledge to unleash your creative drawing potential in SwiftUI.
Let’s pick up our digital brushes and begin!
At its core, Canvas is a SwiftUI View that provides a drawing environment. Unlike Shape views, which declare a shape and let SwiftUI render it, Canvas gives you direct access to a GraphicsContext and the current CGSize of the drawing area. This allows you to perform "immediate mode" drawing operations, meaning you tell SwiftUI exactly what to draw, where, and how, in the order you specify.
Think of it this way:
Shape (e.g., Circle, Path): You define what the shape is. SwiftUI then figures out how to draw it, apply modifiers, and optimize rendering. This is excellent for static or simple dynamic shapes.
Canvas: You get a GraphicsContext and explicitly issue drawing commands within a closure. This gives you fine-grained control over every pixel, making it ideal for:
Complex data visualizations and custom charts
Interactive drawing applications
Game elements and custom animations
Efficient rendering of many small, dynamic drawing elements
Combining images, text, and vector graphics seamlessly
The biggest advantage of Canvas is its performance for complex scenes. When you have hundreds or thousands of individual drawing elements, using Canvas often provides a smoother, more efficient rendering experience compared to creating numerous individual Shape views, which SwiftUI might have to manage as separate view hierarchies.
Getting Started with Canvas: Your First Strokes
Using Canvas is straightforward. You embed it within your SwiftUI view hierarchy just like any other view. Its initializer takes a closure that provides two key parameters: a GraphicsContext and a CGSize.
struct MyDrawingView: View {
    var body: some View {
        Canvas { context, size in
            // Your drawing code goes here
            // context: Provides methods for drawing shapes, images, and text
            // size: The current size of the Canvas view
        }
        .frame(width: 300, height: 200) // Give your canvas a size
        .border(Color.gray) // Optional: to see the canvas boundaries
    }
}
Let’s draw something simple: a red rectangle and a blue circle.
struct MyDrawingView: View {
    var body: some View {
        Canvas { context, size in
            // 1. Draw a red rectangle
            let rect = CGRect(x: 20, y: 20, width: 100, height: 50)
            context.fill(Path(rect), with: .color(.red))

            // 2. Draw a blue circle
            let circleRect = CGRect(x: 150, y: 30, width: 80, height: 80)
            context.fill(Path(ellipseIn: circleRect), with: .color(.blue))

            // 3. Draw a green stroked square
            let squareRect = CGRect(x: 70, y: 90, width: 60, height: 60)
            context.stroke(Path(squareRect), with: .color(.green), lineWidth: 5)

        }
        .frame(width: 280, height: 180)
        .border(Color.secondary)
    }
}
In this example:
We use
context.fill()to draw solid shapes.We create
Pathinstances fromCGRectto define our shapes.Path(rect)for rectangles, andPath(ellipseIn: rect)for circles/ovals.context.stroke()allows us to draw only the outline of a path with a specifiedlineWidth.We apply
Colorusing.color(.red)or.color(.blue).
The
GraphicsContextis your toolkit. It provides a rich API for drawing, filling, stroking, applying transformations, and more. Let's explore some of its powerful features.
Paths for Precision: Going Beyond Rectangles
While Path(rect) is useful, Path itself is a highly versatile tool for creating complex vector shapes. You can construct paths by moving to points, adding lines, curves, and arcs.
struct MyDrawingView: View {
    var body: some View {
            Canvas { context, size in
                // Define a custom star path
                var starPath = Path()
                let center = CGPoint(x: size.width / 2, y: size.height / 2)
                let outerRadius = min(size.width, size.height) / 2 * 0.8
                let innerRadius = outerRadius * 0.4

                for i in 0..<5 {
                    let angle = (Double(i) * 2 * .pi / 5) - .pi / 2 // Start at top
                    let outerPoint = CGPoint(
                        x: center.x + outerRadius * CoreGraphics.cos(angle),
                        y: center.y + outerRadius * CoreGraphics.sin(angle)
                    )
                    let innerAngle = angle + .pi / 5
                    let innerPoint = CGPoint(
                        x: center.x + innerRadius * CoreGraphics.cos(innerAngle),
                        y: center.y + innerRadius * CoreGraphics.sin(innerAngle)
                    )

                    if i == 0 {
                        starPath.move(to: outerPoint)
                    } else {
                        starPath.addLine(to: outerPoint)
                    }
                    starPath.addLine(to: innerPoint)
                }
                starPath.closeSubpath()

                // Fill the star with a custom color
                context.fill(starPath, with: .color(.yellow))

                // Add a thick, dashed stroke
                let dashedStrokeContext = context
                dashedStrokeContext.stroke(starPath, with: .color(.orange), lineWidth: 11)
            }
            .frame(width: 300, height: 300)
            .border(Color.secondary)
        }
}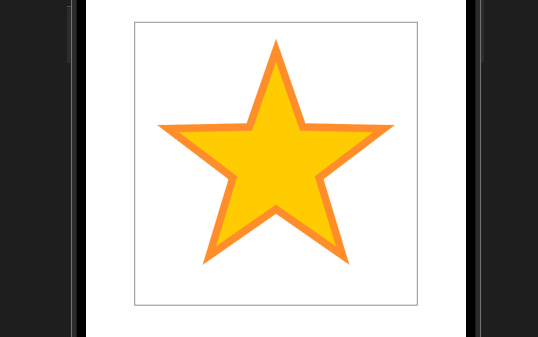
Here, we manually construct a Path for a five-pointed star using trigonometric functions, then fill and stroke it.
The StrokeStyle allows for advanced control over line appearance, including lineWidth, lineCap, lineJoin, and dash patterns.
   // Add a thick, dashed stroke
            let dashedStrokeContext = context
            dashedStrokeContext.stroke(starPath, with: .color(.orange),
                                       style: StrokeStyle(lineWidth: 8, lineCap: .round, lineJoin: .round, dash: [10, 10]))
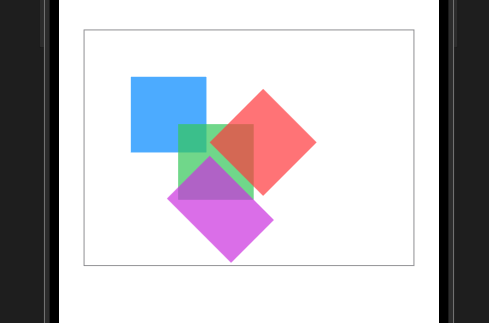
Transformations and Blending
The GraphicsContext allows you to apply transformations like translation, scaling, and rotation to your drawing operations. You can also change the blending mode, affecting how overlapping elements interact.
struct MyDrawingView: View {
    var body: some View {
        Canvas { context, size in
            let squareSize: CGFloat = 80
            let initialRect = CGRect(x: 50, y: 50, width: squareSize, height: squareSize)

            // 1. Draw a base square (blue)
            context.fill(Path(initialRect), with: .color(.blue.opacity(0.7)))

            // 2. Apply a translation and draw another square (green)
            context.translateBy(x: 50, y: 50) // Move everything drawn after this by 50, 50
            context.fill(Path(initialRect), with: .color(.green.opacity(0.7)))

            // 3. Apply rotation around its center, then draw (red)
            // It's important to translate to the center, rotate, then translate back
            context.translateBy(x: initialRect.midX + 50, y: initialRect.midY + 50) // Translate to center of green square's position
            context.rotate(by: .degrees(45)) // Rotate by 45 degrees
            context.translateBy(x: -(initialRect.midX + 50), y: -(initialRect.midY + 50)) // Translate back to apply rotation around its own center
            context.fill(Path(initialRect), with: .color(.red.opacity(0.7)))

            // 4. Apply a scale and draw (purple)
            context.translateBy(x: 0, y: 100) // Move down the Y-axis
            context.scaleBy(x: 1.2, y: 0.8) // Scale
            context.fill(Path(initialRect), with: .color(.purple.opacity(0.7)))

            // Demonstrating Blend Mode
            let blendRect1 = CGRect(x: 200, y: 50, width: 70, height: 70)
            let blendRect2 = CGRect(x: 230, y: 80, width: 70, height: 70)

            context.fill(Path(blendRect1), with: .color(.cyan))
            context.blendMode = .multiply // Change blend mode
            context.fill(Path(blendRect2), with: .color(.cyan))
            context.blendMode = .normal // Reset blend mode

        }
        .frame(width: 350, height: 250)
        .border(Color.secondary)
    }
}
Performance and Optimization Tips
While Canvas is performant, complex drawing can still be heavy. Here are some tips:
Minimize Redraws: If parts of your drawing are static, consider splitting your
Canvasinto multiple layers or pre-rendering complex paths into images if they don't change.Offload Heavy Calculations: Any computationally intensive path generation or data processing should ideally happen outside the
Canvasclosure, perhaps in an ObservableObject or a background task. The closure itself should focus purely on drawing based on pre-calculated data.Use
DrawingGroupSparingly (for Canvas):drawingGroup()rasterizes a view hierarchy into a single offscreen image, which can improve performance for complex composed SwiftUI views. ForCanvas, which is already a high-performance drawing surface,drawingGroup()might not always provide a significant benefit and could even introduce overhead if not used judiciously. Generally, rely onCanvas's inherent performance.Leverage
CGPath: For extremely complex or performance-critical path generation, you can drop down toCore GraphicsCGPathand then convert it to a SwiftUIPath.Understand the
GraphicsContextLifecycle: TheCanvasclosure is called whenever SwiftUI deems a redraw necessary. Be mindful of what you're doing inside that closure.
Interactive and Advanced Canvas Techniques
Canvas truly shines when combined with other SwiftUI features:
Responding to Gestures: You can attach SwiftUI gestures (e.g.,
DragGesture,TapGesture) directly to yourCanvasview. Inside the gesture'sonChangedoronEndedclosures, you can update state variables that, in turn, trigger a redraw of theCanvaswith new drawing instructions. This is how you'd build drawing apps where users can sketch with their finger.Animating Canvas Elements:
Canvasintegrates beautifully with SwiftUI's animation system. By changing state variables that influence drawing parameters (e.g., position, rotation, color) and wrapping these changes inwithAnimation,Canvaswill smoothly interpolate between the drawing states. For more complex, continuous animations,TimelineViewcan be used to driveCanvasredraws at a consistent frame rate.Combining with
GeometryReader: To create responsive drawings that adapt to their container size, embed yourCanvaswithin aGeometryReader. This allows you to dynamically calculate drawing coordinates and sizes based on the available space. Thesizeparameter passed into theCanvasclosure already gives you the current size, makingGeometryReaderoften redundant unless you need to coordinate sizing with other views outside the Canvas itself.
Conclusion
Canvas in SwiftUI is a game-changer for anyone looking to push the boundaries of custom user interfaces and graphics. It bridges the gap between SwiftUI's declarative power and the low-level control needed for intricate drawing, offering a performant and flexible environment for your creative visions. From bespoke charts and data visualizations to interactive sketching apps and unique game assets, Canvas provides the tools to bring your ideas to life with precision and efficiency.
By understanding GraphicsContext, mastering Path construction, and leveraging SwiftUI's ecosystem for gestures and animations, you can transform your apps from merely functional to truly captivating. So, what are you waiting for? Dive into Canvas, experiment with its capabilities, and start drawing the future of your SwiftUI applications.
Visit https://www.devtechie.com for more